
Practice EHR is excited to share the following enhancements deployed in this October 2022 release. These enhancements include a new inventory workflow for tracking DME, and other products sold within the practice, an expanded use of the patient message feature, as well as the ability to block appointment slots on a master calendar for specific appointment reasons.
1. Patient Messaging
The patient messaging feature has been added and can be configured in Practice Profile in Setup to send the following patient messages:
Setup
A user can start the setup process from Home > Setup > Practice. Three messaging methods to send predefined messages have been added, which the user can access via a dropdown menu.

Following are the methods made available for patient messaging configuration:
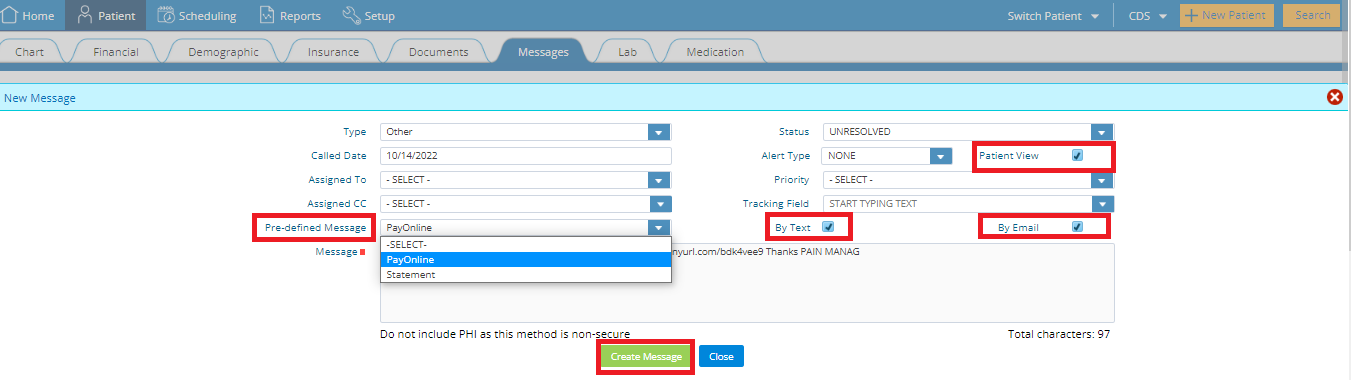
Sending Patient Messages
Currently there are 2 predefined messages available:
Practice can add custom messages by creating a ticket in support. We are doing to protect PHI information of patient that’s why we want approved messages by Practice.
Also, text messaging rates will apply to the Practice for each message sent.
Once the settings are in place, messages can be sent to the patient using the existing Patient Messages workflow within the individual patient’s messages screen. Upon selecting the predefined message from the dropdown, checkboxes for “By Text” & “By Email” will automatically get checked based on the practice setup.
2. E-Statements
This new feature will allow users to send e-statements via text message or email to patients directly
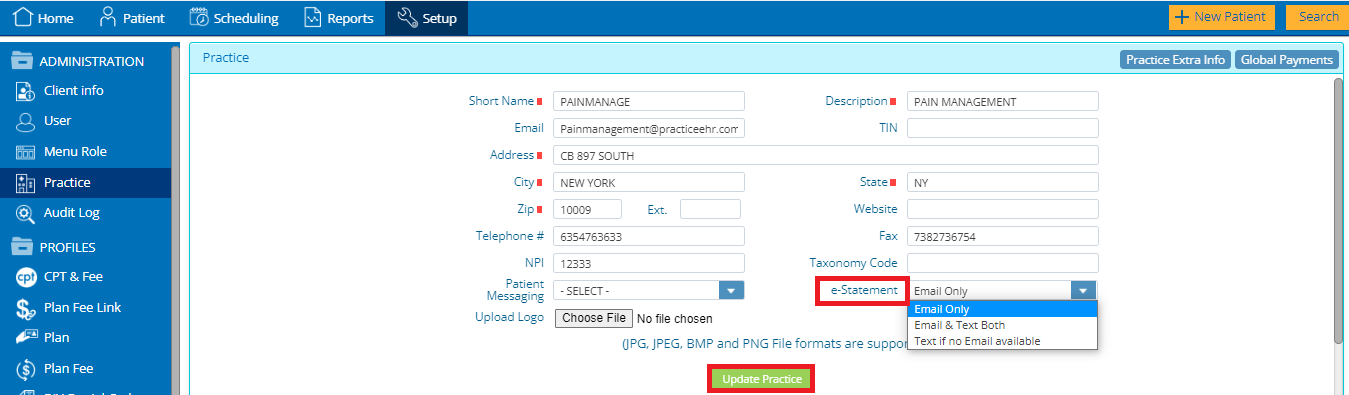
Setup
A user can start the setup process from Home > Setup > Practice. E-Statement methods must be selected from a dropdown menu.
Following are the methods available for e-Statement configuration
In order to send an e-Statement to a patient, the e-statement checkbox must be checked in the “extra info” section of patient’s demographics.
3. Enhanced User’s Account Security
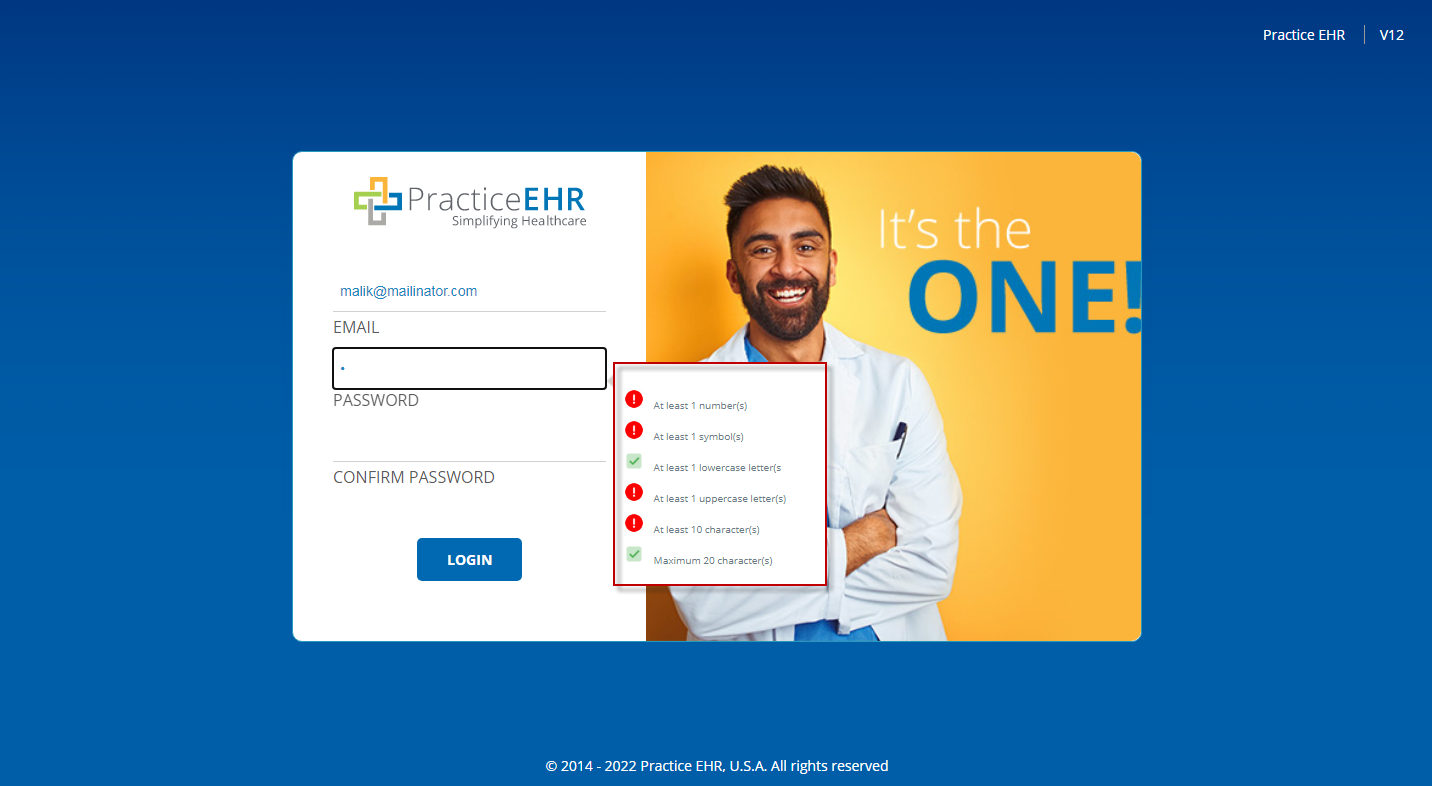
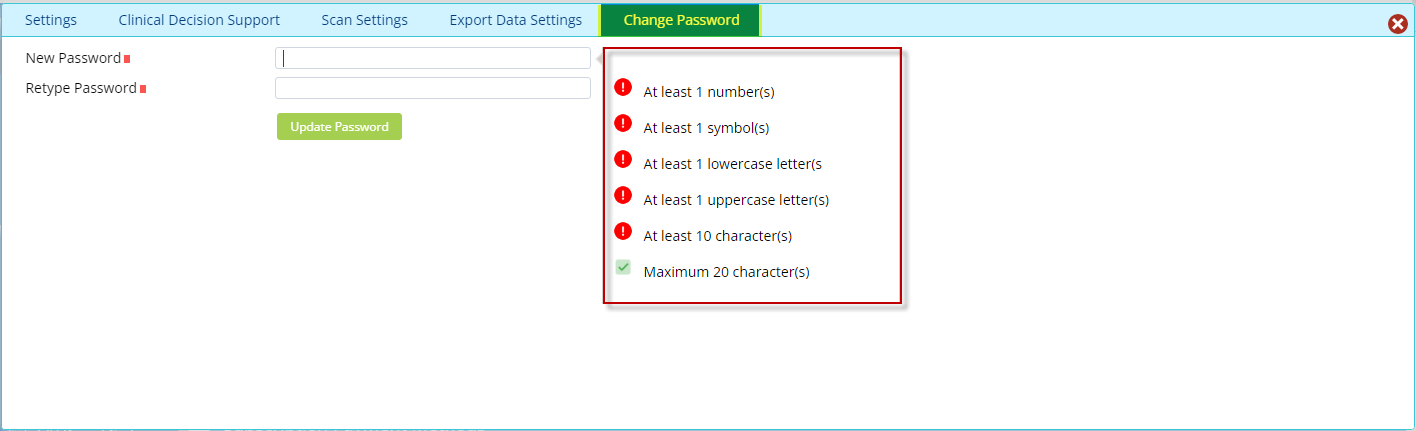
In this release security has been enhanced and users will now have provision to create strong passwords. The user will have to choose a password that should contain:
All new logins will be required to use strong passwords; however, the existing accounts will remain as they are but they can be converted to strong passwords upon the practice’s request.
This feature is not activated by default. In order to activate, the practice will need reach out to Client Services or our Support Representatives.
Note: All passwords must be strong passwords by the 1st of January 2023.
(User Setting > Change Password – Window)
4. Inventory
Practice EHR is now introducing an inventory function targeted towards the effective and efficient management of inventory.
The inventory functionality will allow the practice to add drugs, over the counter supplies and DME equipment as inventory. Each piece of inventory can be tracked via a user defined procedure code, which can also be added to individual clinical visits. This will allow the practice to:
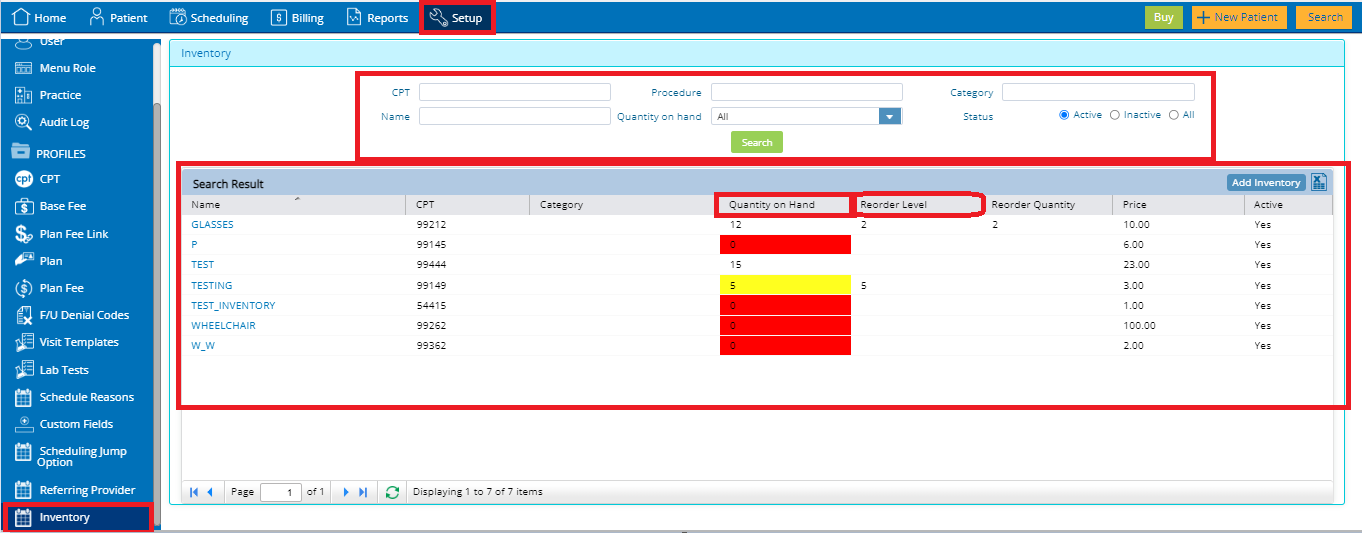
Setup
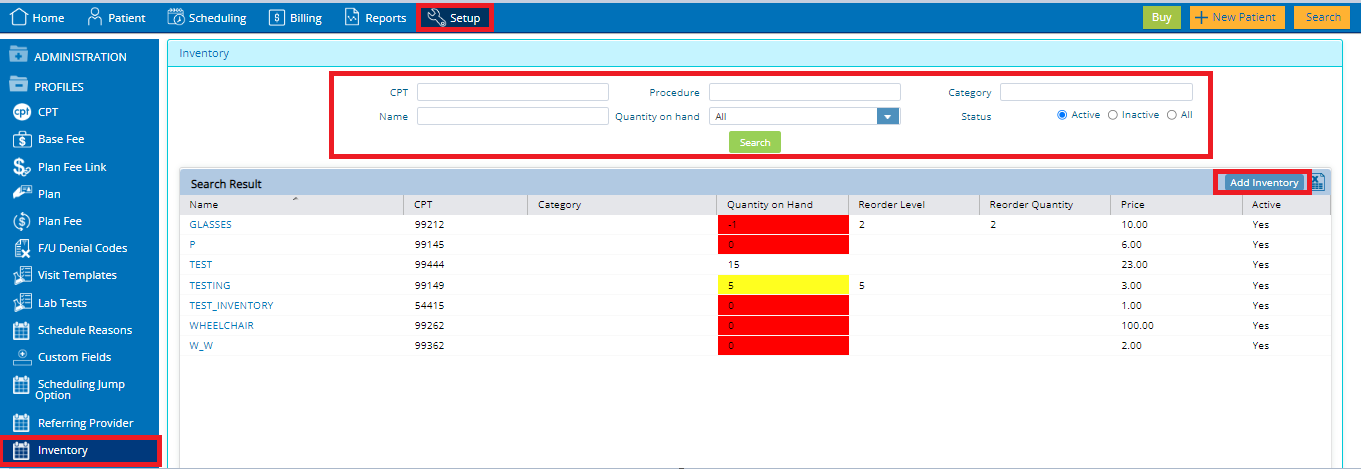


The Inventory inquiry window has been designed with multiple search criteria to find the product and display details of available stock in the inventory. Upon creation/deletion of the encounter (financial record) the procedure code will be checked against the inventory for availability
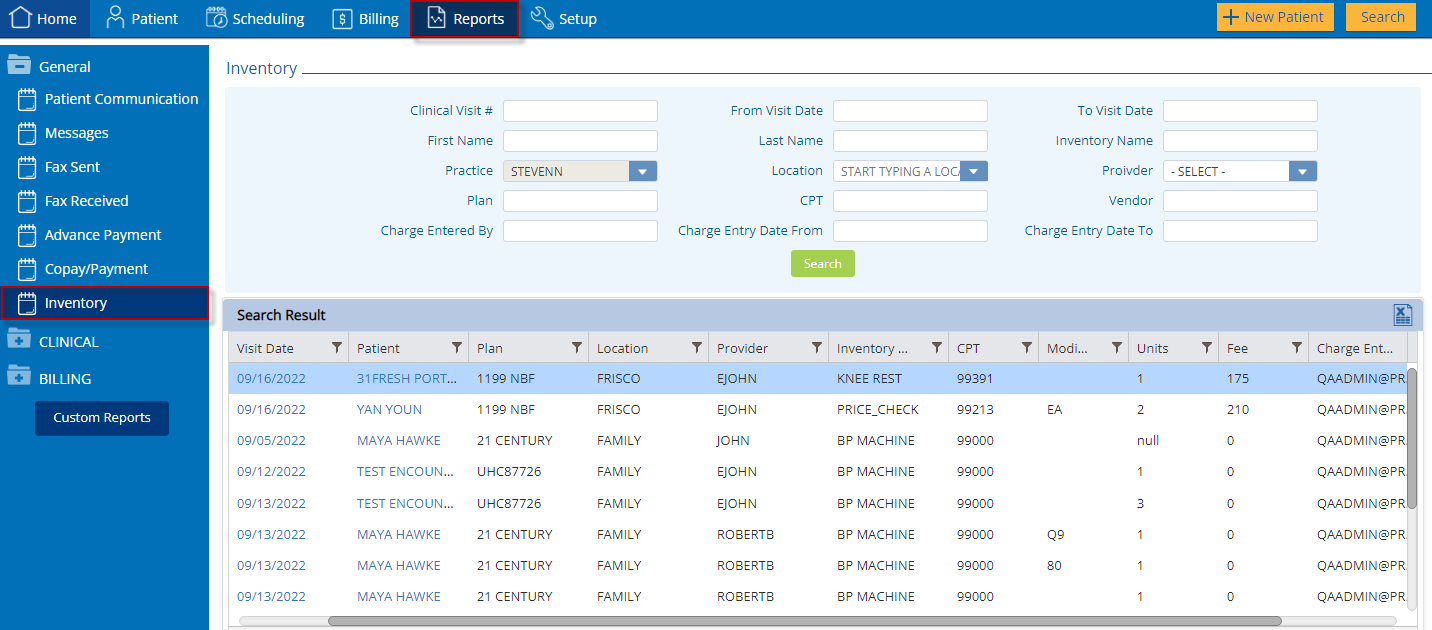
Reporting
A new report “Inventory” has been added under General Reports, which will record and display all visit line items that will be billed against any inventory products and their quantity for practice to ensure that all products dispensed have been accounted
5. Patient Forms (Fillable PDF)
Practices will now have the availability of fillable forms to fill out on the patient demographics, which will be then saved into patient documents as in PDF.
6. Scheduling Module Update
This feature will allow the practice to generate a master calendar based on appointment reason. This will allow the provider the flexibility and convenience to only accept appointments for patients that have a certain reason on certain days, meaning a provider can make it so that all appointments on Thursday for New patients.
The user will now also have the ability to send Kiosk Links and Tele-Visit Links as messages to patients from the scheduling module.
Create Provider Schedule with Reason
Users can create a new calendar with this feature from the existing workflow to create a master schedule. There are two new fields:
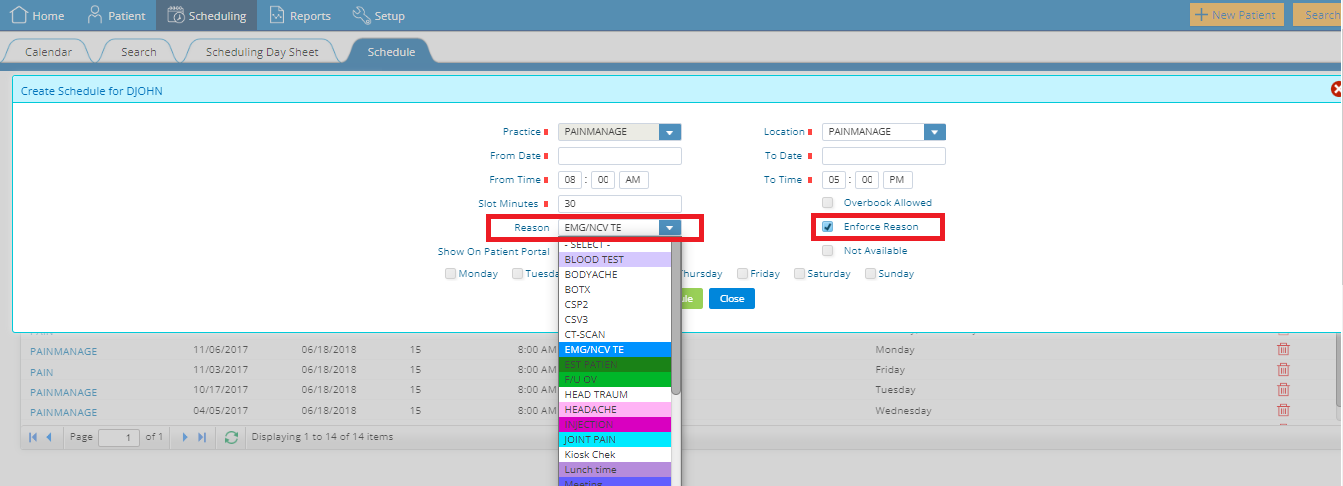
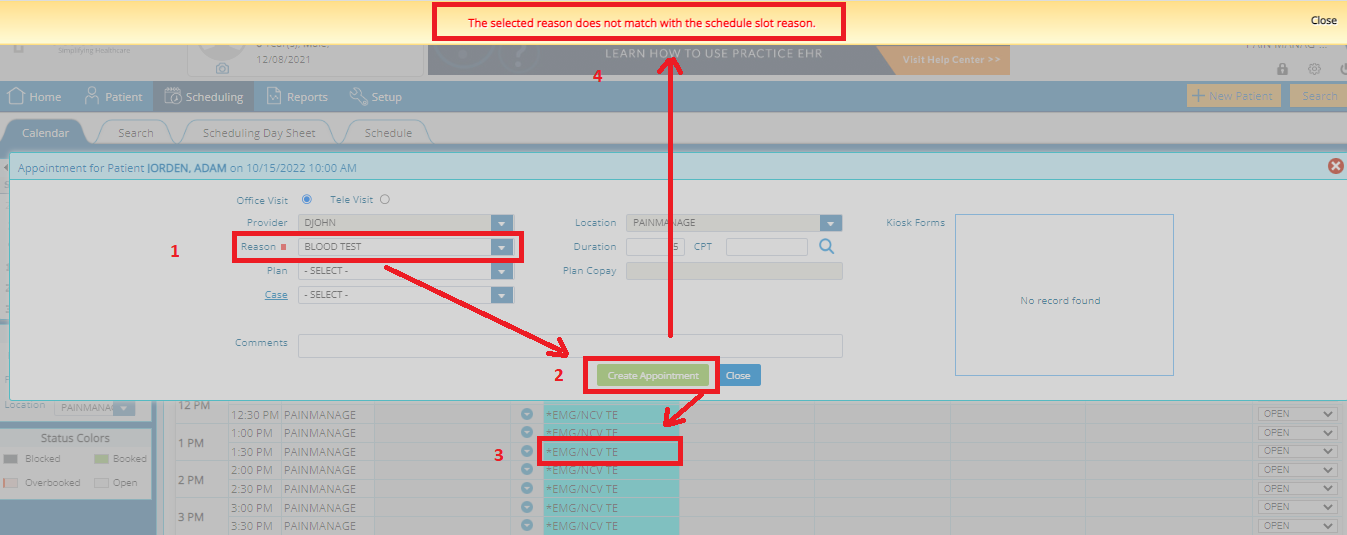
If Enforce Reason is unchecked on the Provider schedule, default Reason would still be the one selected in the Provider Schedule and then user can book an appointment with any different reason in the calendar which will overwrite the existing reason.

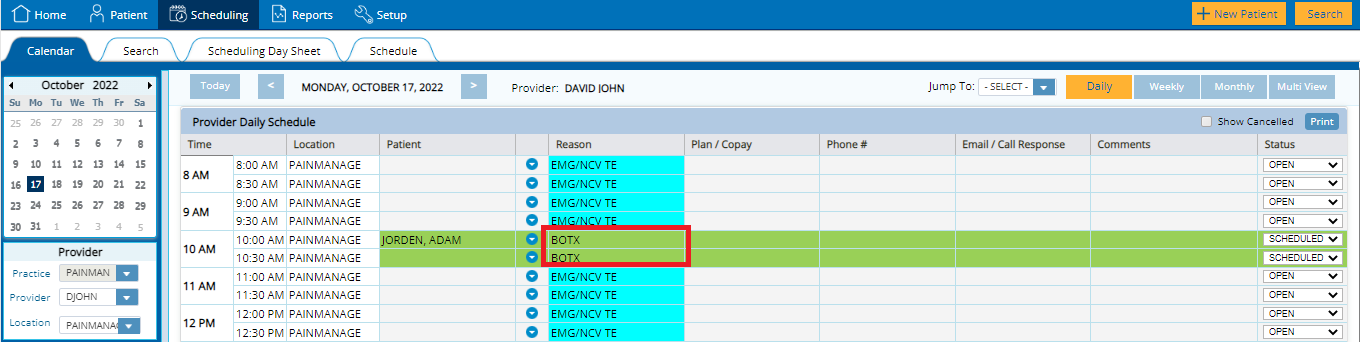
Reasons Display on Calendar
Once the reason has been selected for a provider’s schedule, the calendar will display that reason in the reason column with a specific reason color on the appointment.
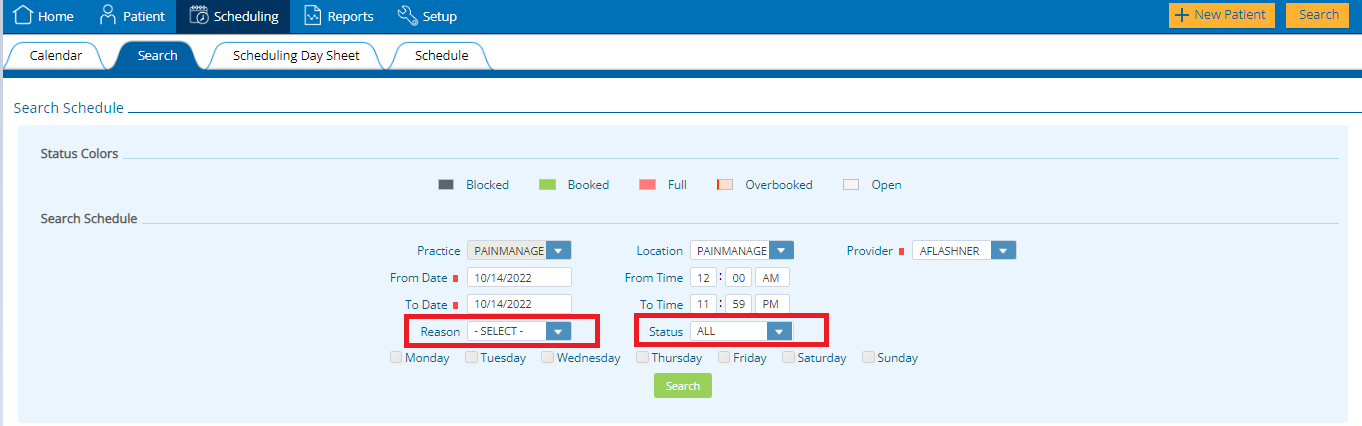
Search Appointments for Reason
With the added functionality of linking an appointment reason to a specific appointment slot, the user can now search by using the following filters in the Scheduling – Search window
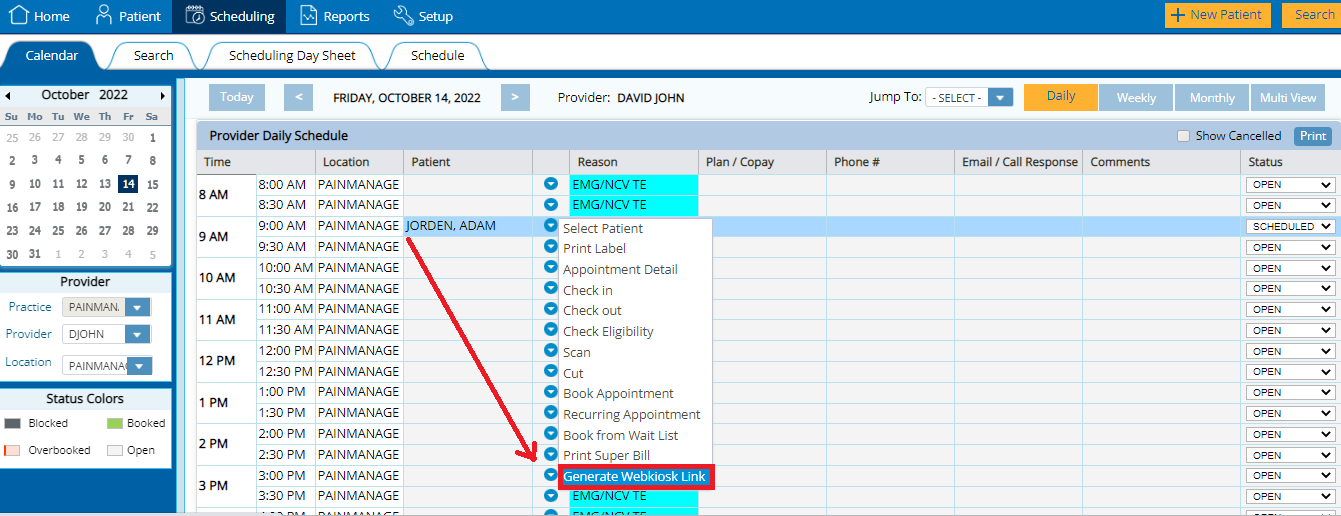
Generate and Send Kiosk Link
(Scheduling > Calendar > Generate Web Kiosk Link)
The individual forms that are appropriate for that patient’s visit are selected within the appointment detail window. The expanded delivery options are now available in “Generate WebKiosk Link” The user may now select:

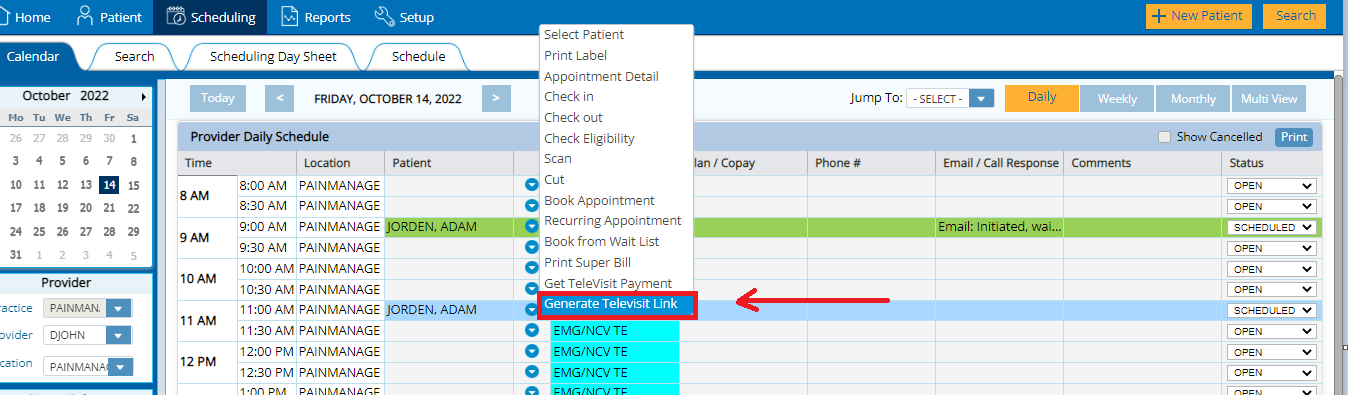
Generate and Send Tele-Visit Link
(Scheduling > Calendar > Generate Tele-Visit Link)
For Tele-visit appointments, practice can send the appointment link to patients by “Generate Tele-Visit Link” to start their appointments via Email, Text or both depending upon their patient messaging setup in practice.

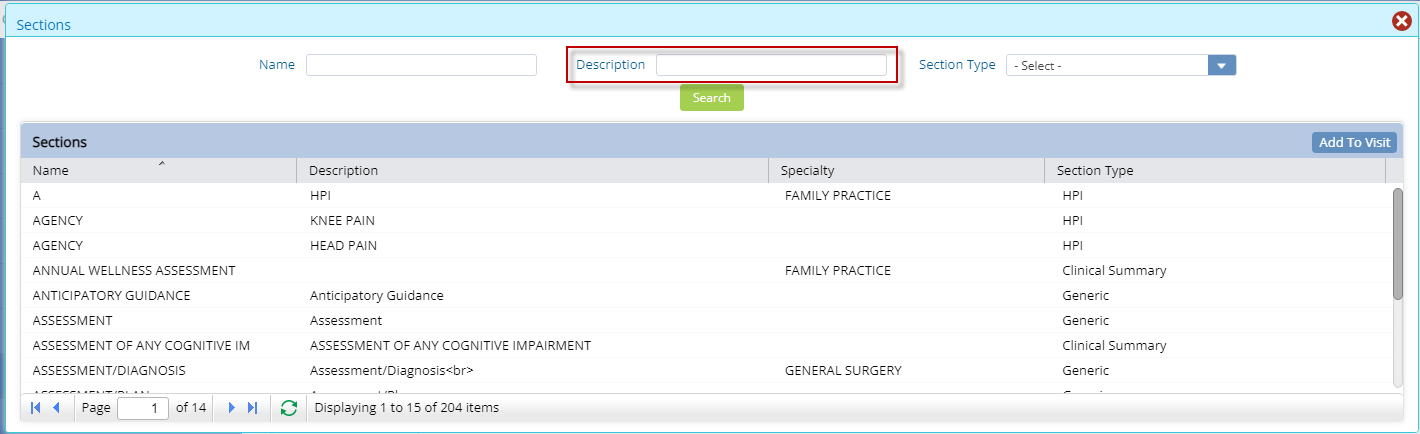
7. Clinical Section Search Enhancement
To further improve navigation and utilization of this feature, an additional field “description” has been added, which will allow the user to simply search for their required section and insert it into a clinical visit without having to accurately remember the section’s name.
This will allow providers to focus more of their time on the patient rather than scrolling to find a section template. The user can now view the additional information and filter the results by additional key words.
The “Add Section” prompt can be accessed as follows: Open Visit Tab > Blue Gear Icon > Add Section
8. Create Clinical Ticket
To facilitate the creation of custom templates, Practice EHR is adding the “Create Clinical Ticket” option, within an open clinical visit that can be accessed from the blue gear icon.
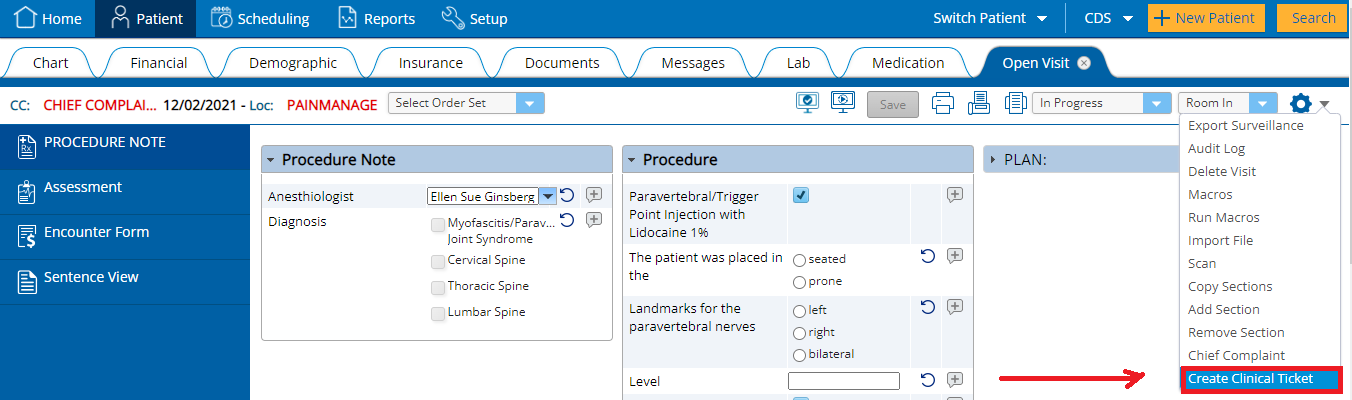
This grants the provider with a more precise and faster way to communicate template changes to the support staff. Ensuring that the changes are carried out to the provider’s specification more accurately and reducing the risk of errors with the template creation.
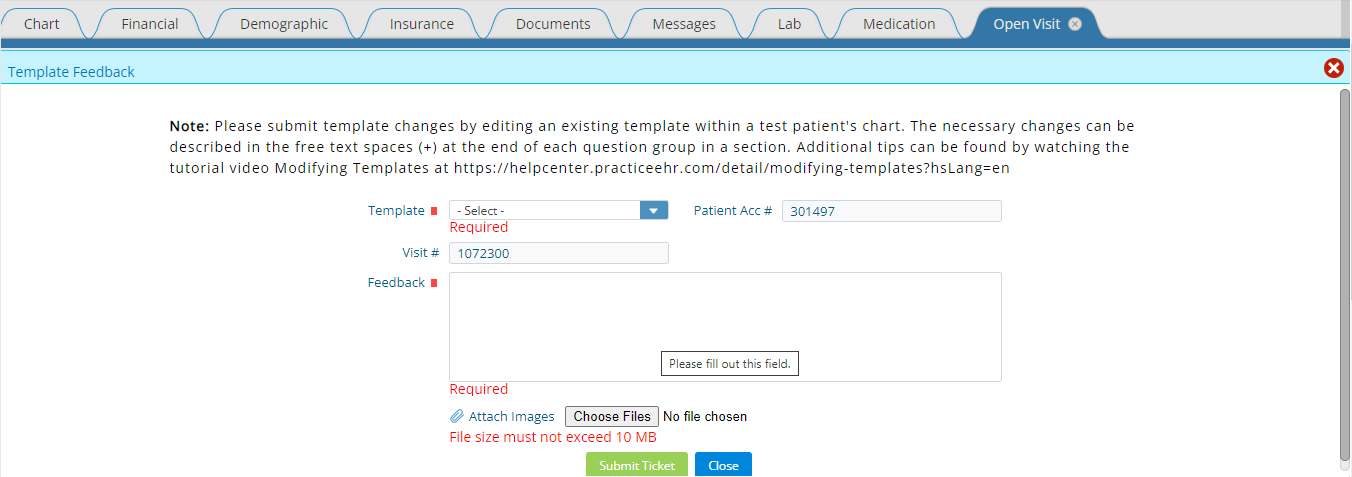
Any questions or comments from the Practice EHR team will be communicated to the user via same ticket. All tickets can be viewed from the Support Center on the Home screen.
9. Common Drugs & Auto-Fill SIG
This release automates the process of adding Common Drugs, SIG & RX eligibility response:
This integrates the adding to common feature with the normal workflow and this will also auto-fill the medication field if the same drug is to be selected.
This will auto populate the next time that sig is selected for a specific medication.
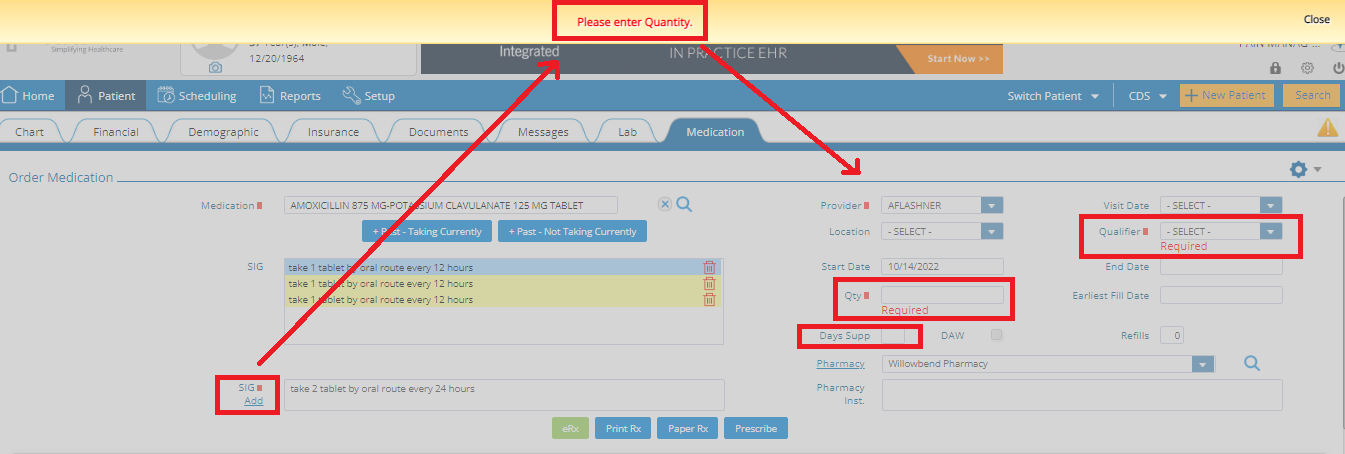
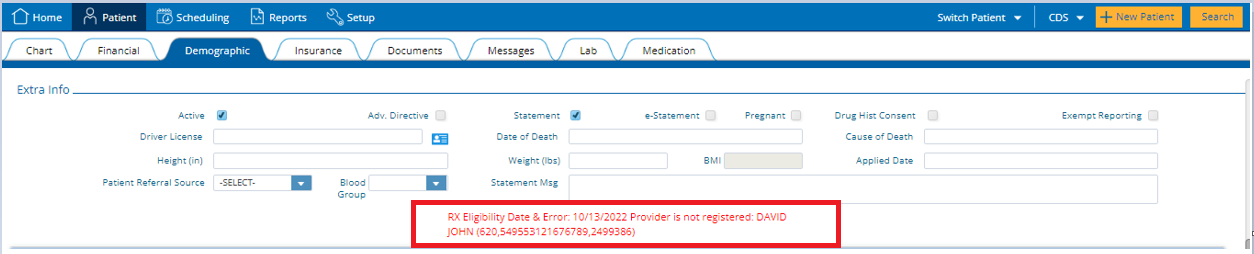
10. Rx Eligibility
No Rx eligibility reason message shown in patient demographic extra info when user is not able to access the eligibility.
Reason message defines what information needs to be entered in patient demographic/provider profile setting in order to access the Rx eligibility
The automation of the above steps will allow for a faster workflow and since there are fewer steps involved, the chances of human errors, such as entering of incorrect information are highly reduced.
11. Patient Portal
The following additions have been made to the Patient Portal.
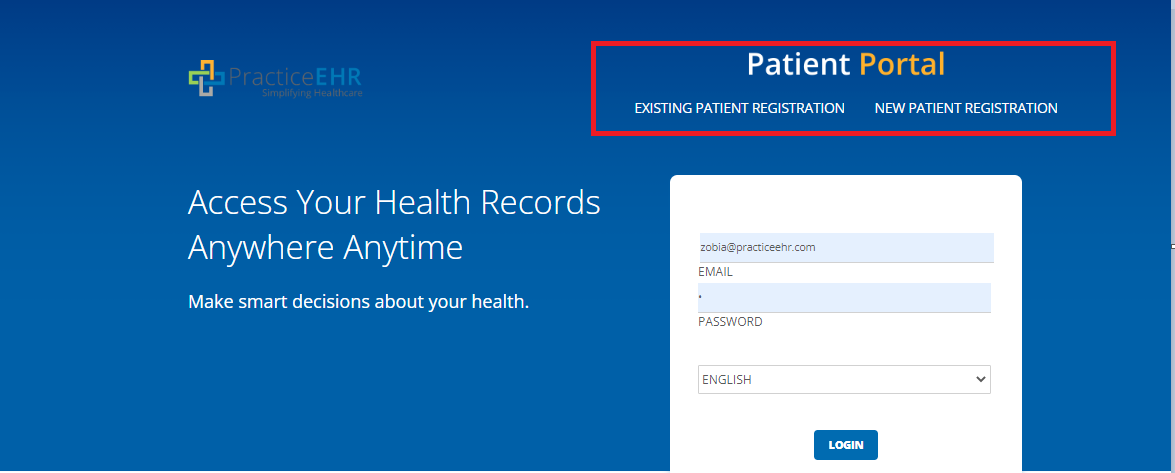
Existing Patient Registration
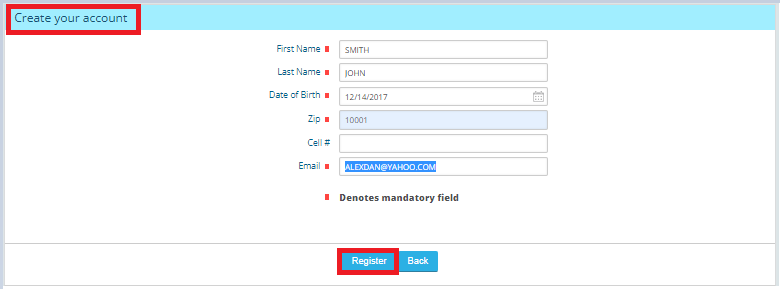
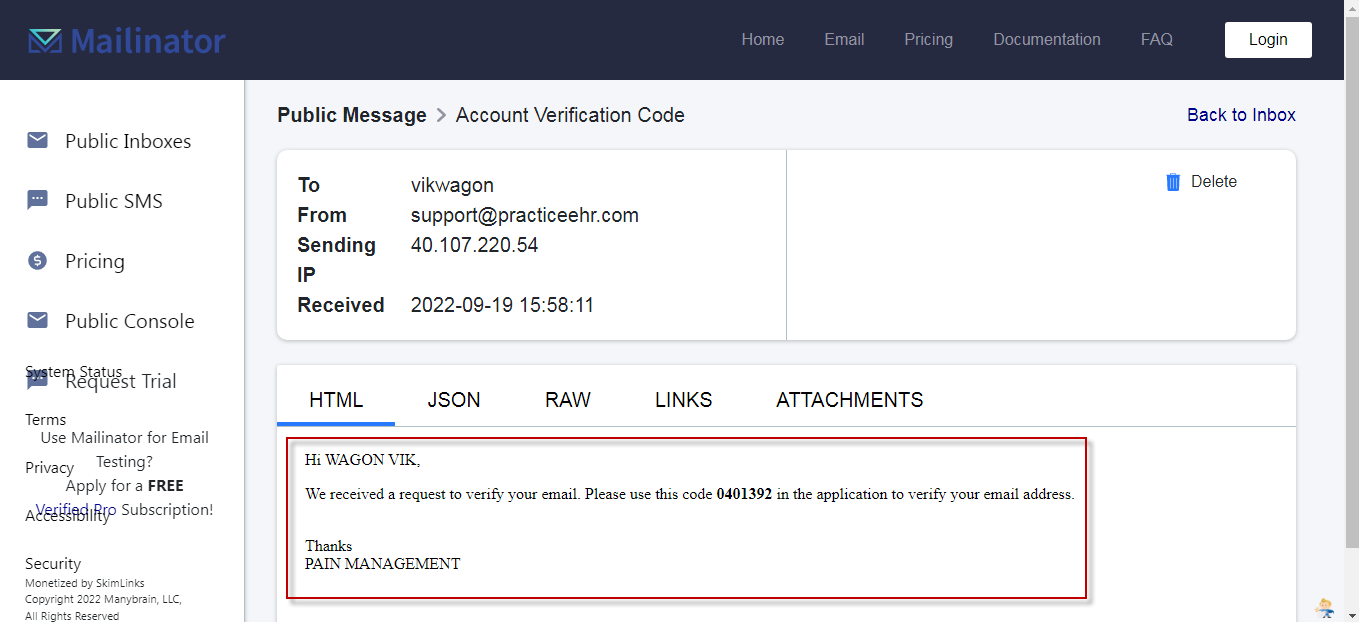
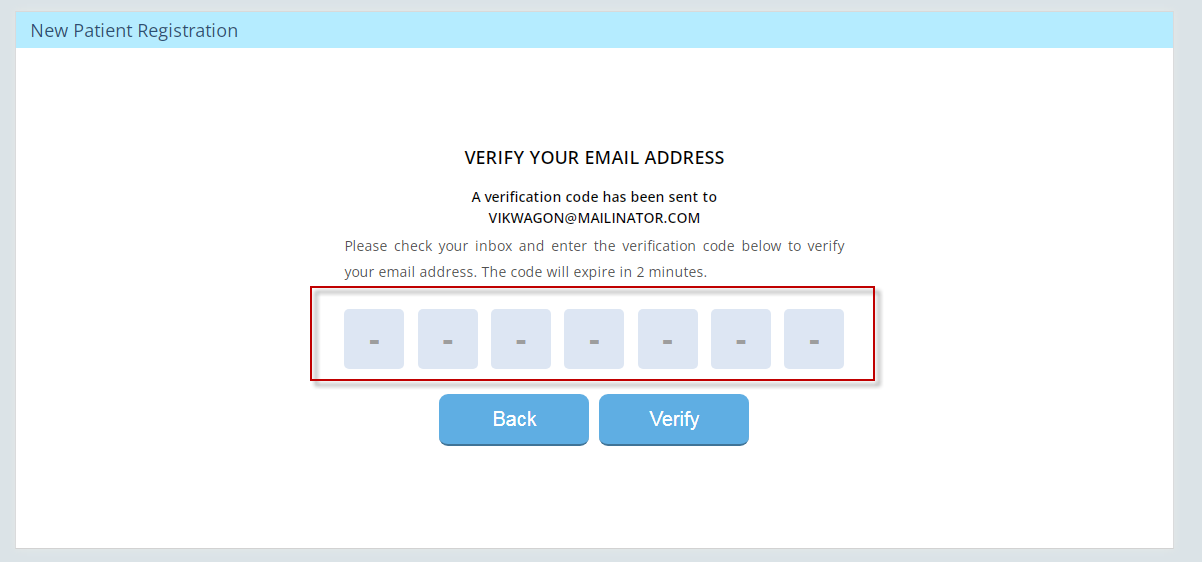
New Patient Registration
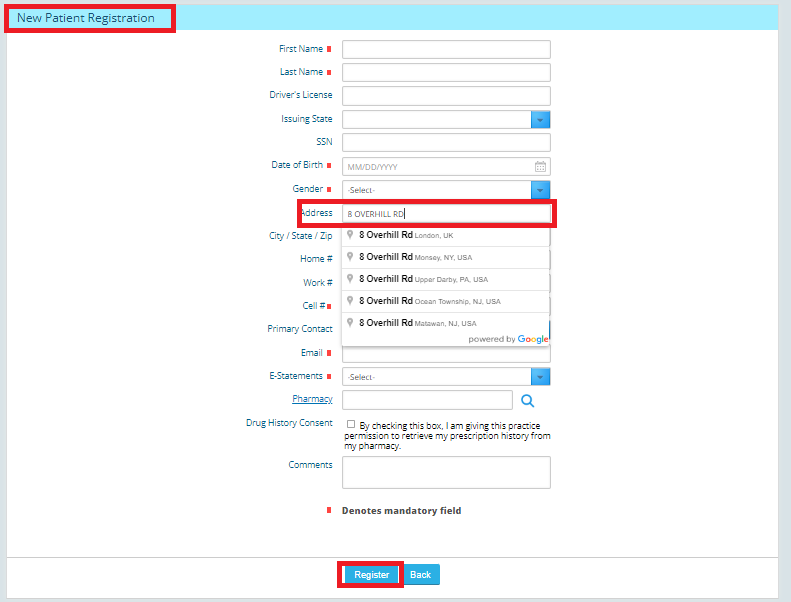

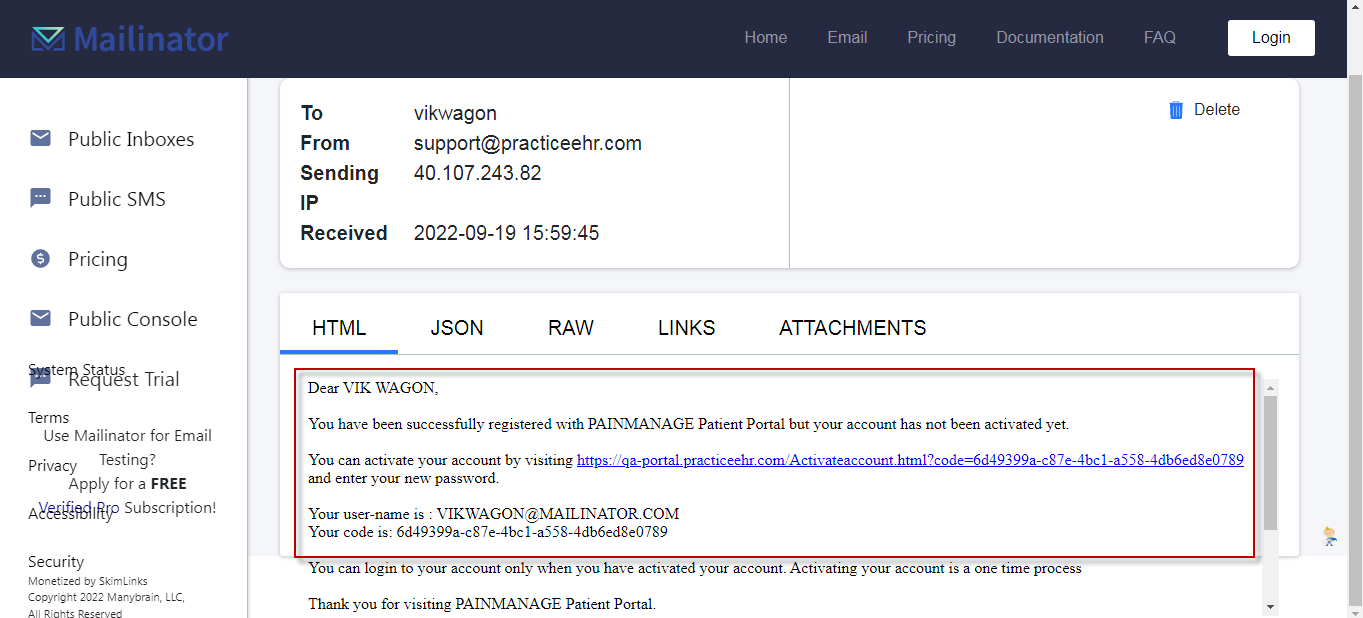
The practice can still initiate the patient portal from the patient’s demographic screen. This action will generate the same patient portal link email described above.
Self Appointment Scheduling
Patients will now be able to schedule their appointments directly into the available slots on the provider’s calendar. The new option is not activated by default and can be activated upon the practice’s request.
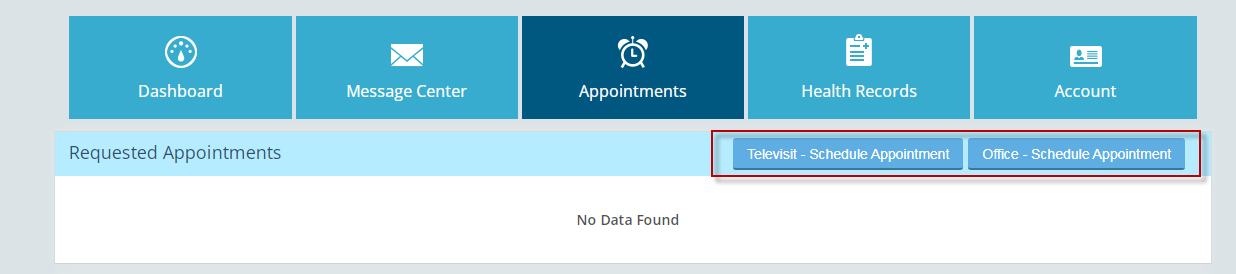
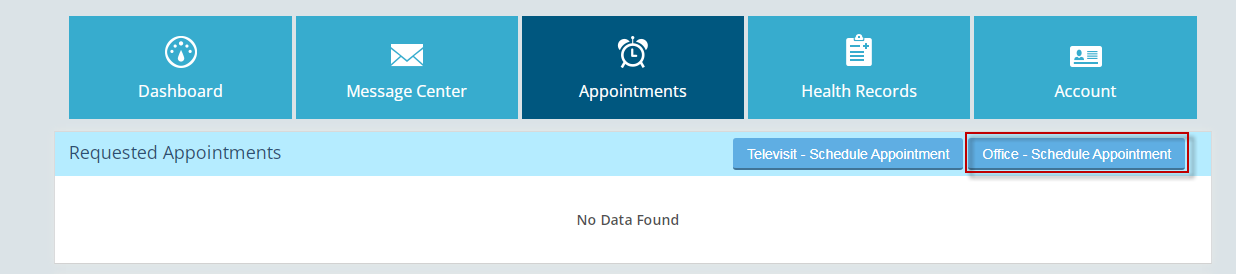
On patient portal appointments tab, the option to Schedule Appointment for both Televisit and Office Visit is now visible as two separate options. The patient will choose which type of appointment they want to schedule. Practice can have both or any one
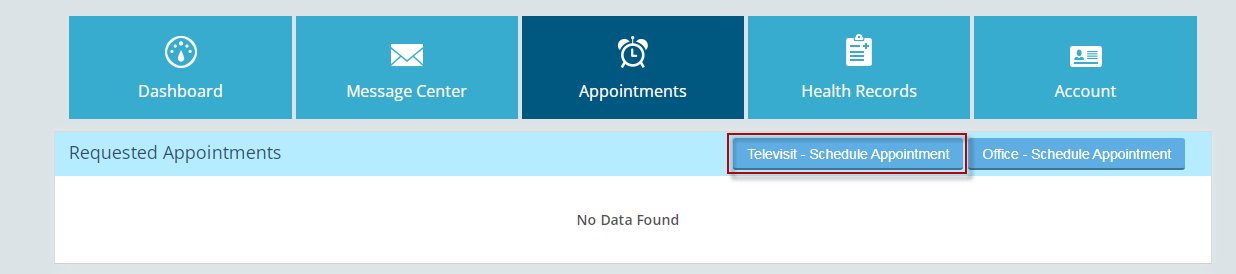
Televisit Appointment Scheduling
Upon selecting to schedule a Televisit Appointment option the following flow will commence:
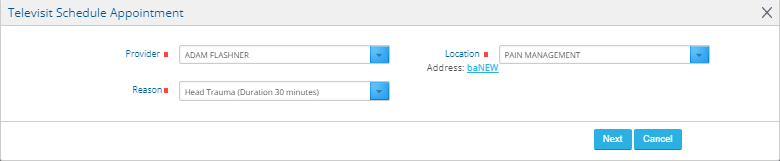
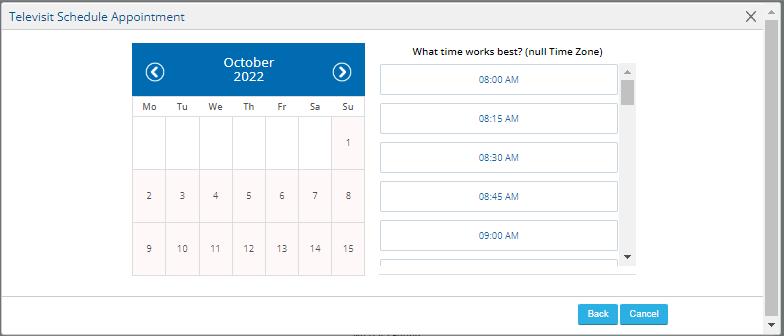
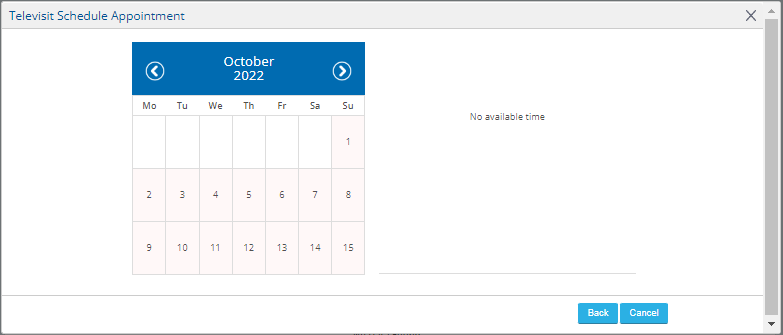
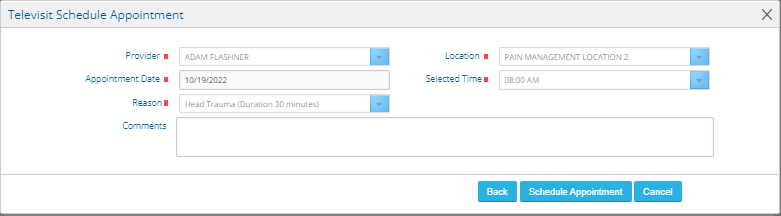
The patient will select a Provider, Location and Reason and click ‘next’ to choose the appointment date and time.
After patient clicks on the slot, the schedule window will update with appointment date and time.
Where the slot that patient has selected for appointment is not available then system will indicate with “No available time” message.
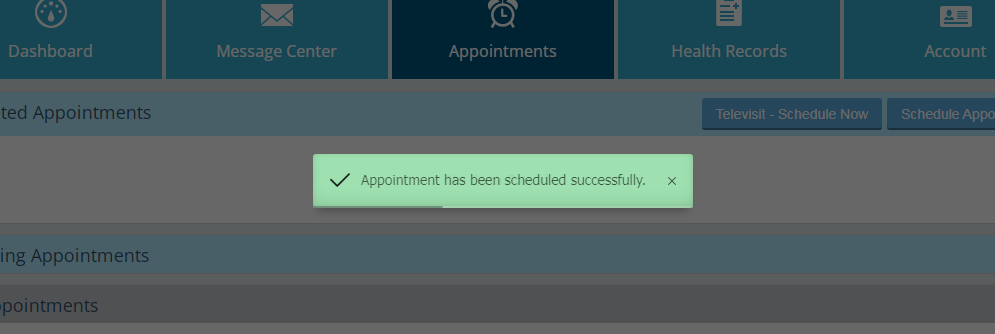
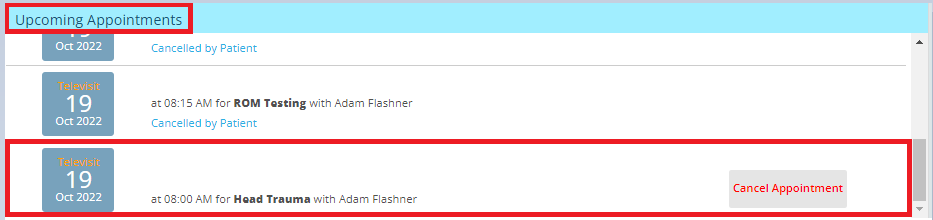
If the selected slot is available then after clicking “Schedule Appointment” appointment will be booked with a notification that “Appointment has been schedule successfully”.
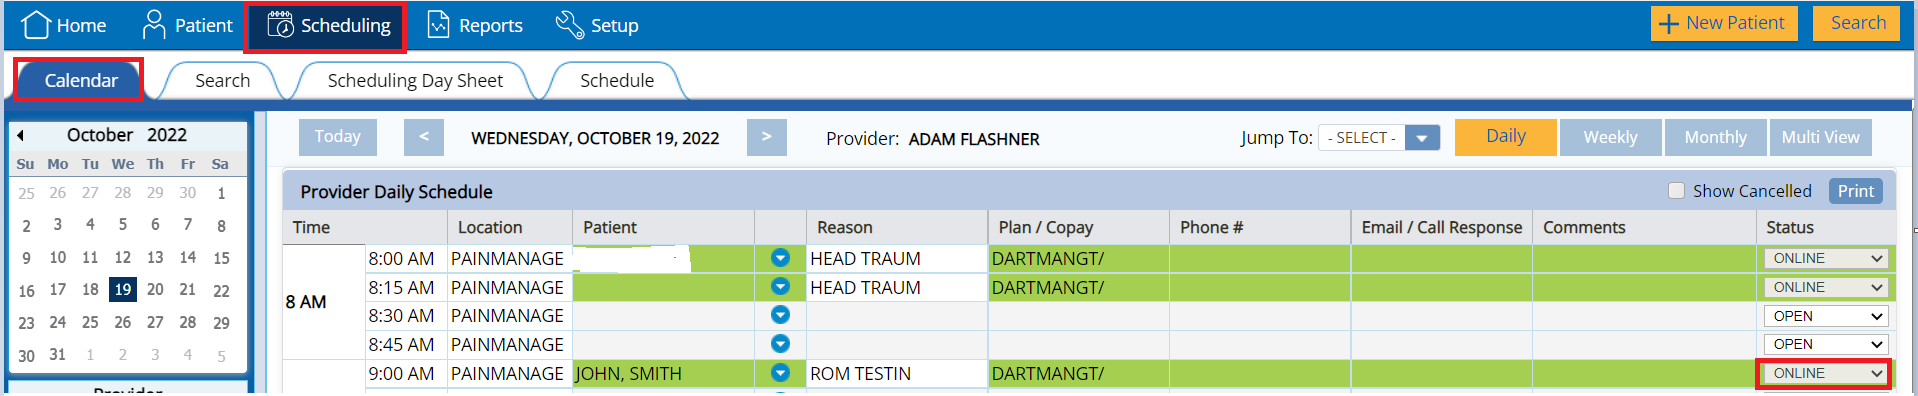
Scheduling - Provider Daily Schedule > Online Appointment
Appointment booked from patient portal will show in Provider daily schedule with status as ‘’Online’’

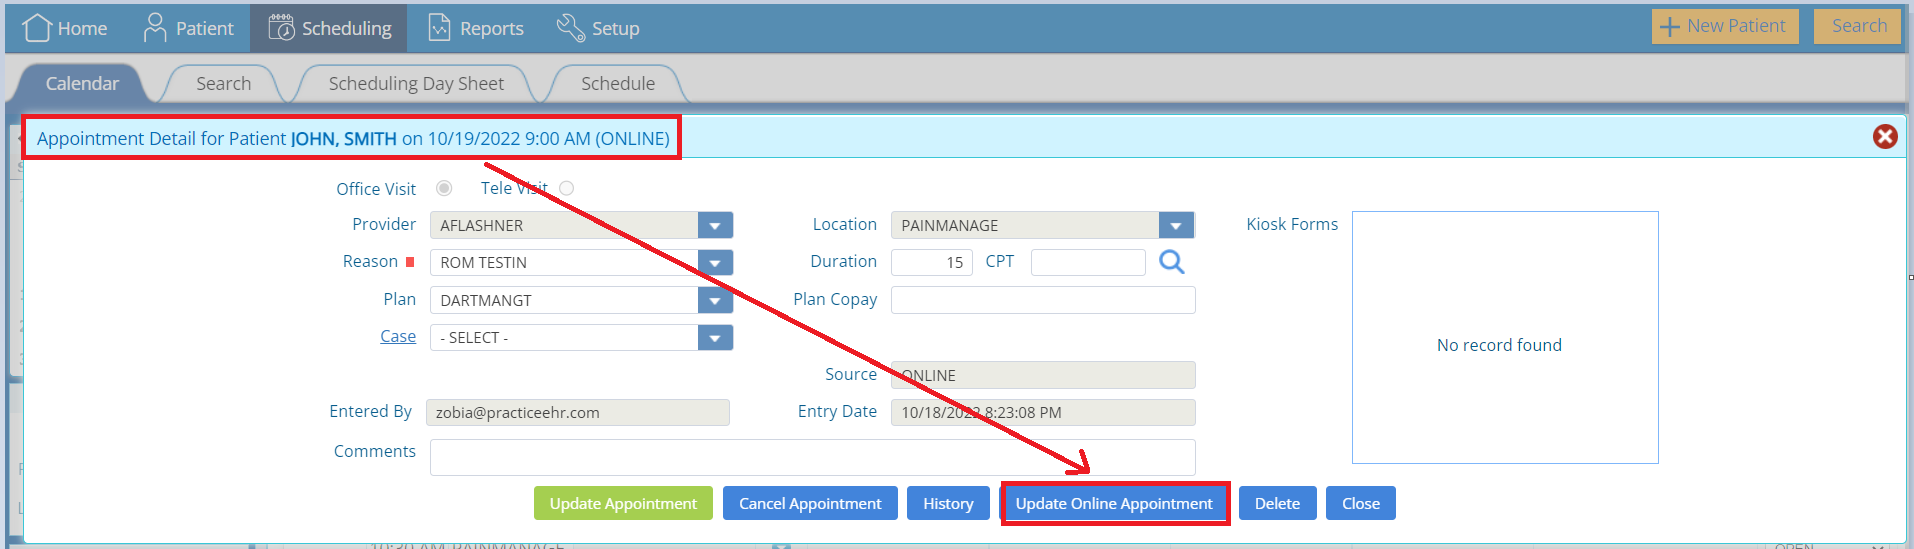
Provider can confirm the online appointment by clicking on the ‘’Update Online Appointment’’ from the appointment detail window.

Upon provider confirmation by clicking the “Update Online Appointment” option, appointment status will be updated as ’Scheduled ‘’

Patient Portal – Tele-Visit > Patient Check-in
Once the appointment is confirmed by the provider then Tele-Visit appointment will display the ‘’Check-in’’ option to start patient Tele-Visit session within 30 minutes of their appointment time. Patient Check-in time default setup is ‘’30 minutes prior to the appointment’’is customizable to be setup upon Practice request by client services or support representative

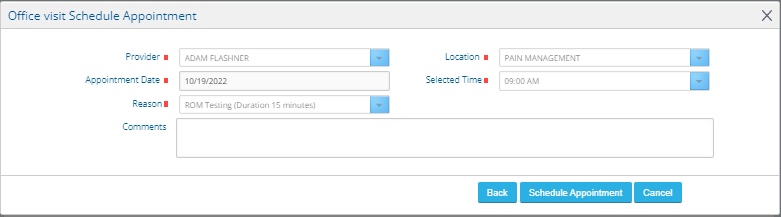
Office Visit Appointment Scheduling
Same process as explained for the Tele-Visit appointment scheduling will be utilized and only with a different scheduling type i.e. Office-Visit Appointment Scheduling.
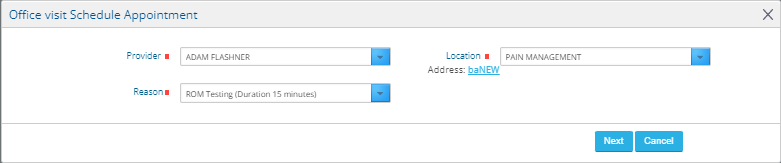
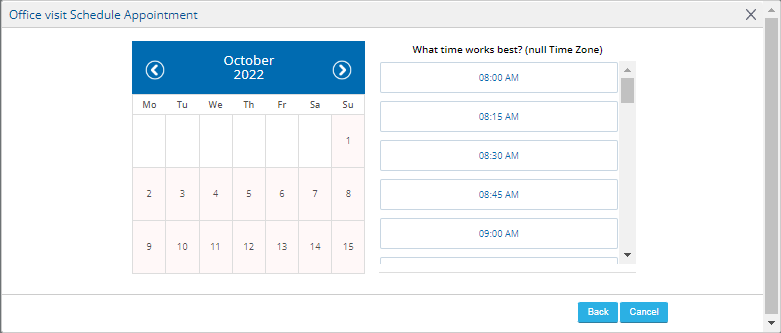
The patient will select a Provider, Location and Reason and click ‘next’ to choose the appointment date and time.
After patient clicks on the available slot, the schedule window will update with appointment date and time.
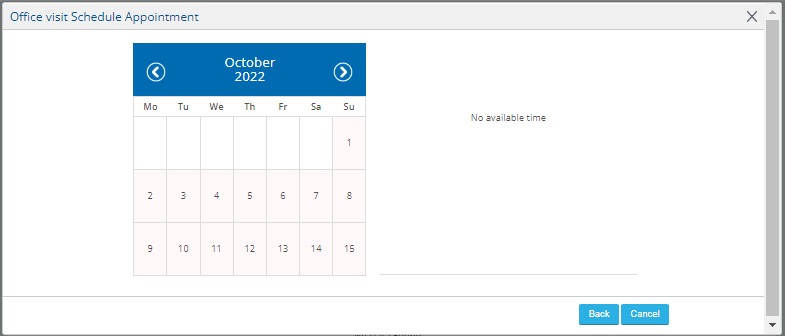
Where the slot that patient has selected for appointment is not available then system will indicate with “No available time” message.
If the selected slot is available then after clicking “Schedule Appointment” appointment will be booked with a notification that “Appointment has been schedule successfully”.


Scheduling - Provider Daily Schedule > Online Appointment
Scheduled appointment from the patient portal will show in Provider’s daily schedule with status as ‘’Online’’
Provider can confirm the online appointment by clicking on the ‘’Update Online Appointment’’ from the appointment detail window and appointment status will be updated as ‘’Scheduled‘’.
Office visit will start upon patient checked-in in the Provider office.

Note:
If the practice has appointment reminders setup within Practice EHR, the patient will also receive an appointment reminder via text/email/phone at the specified interval prior to this appointment.


![]()
![]()


