
Practice EHR is excited to share enhancements included in the March 2022 release! These enhancements include new features to improve the setup process and assist with managing your Practice EHR subscription. The new features are visible to all Practice EHR clients.
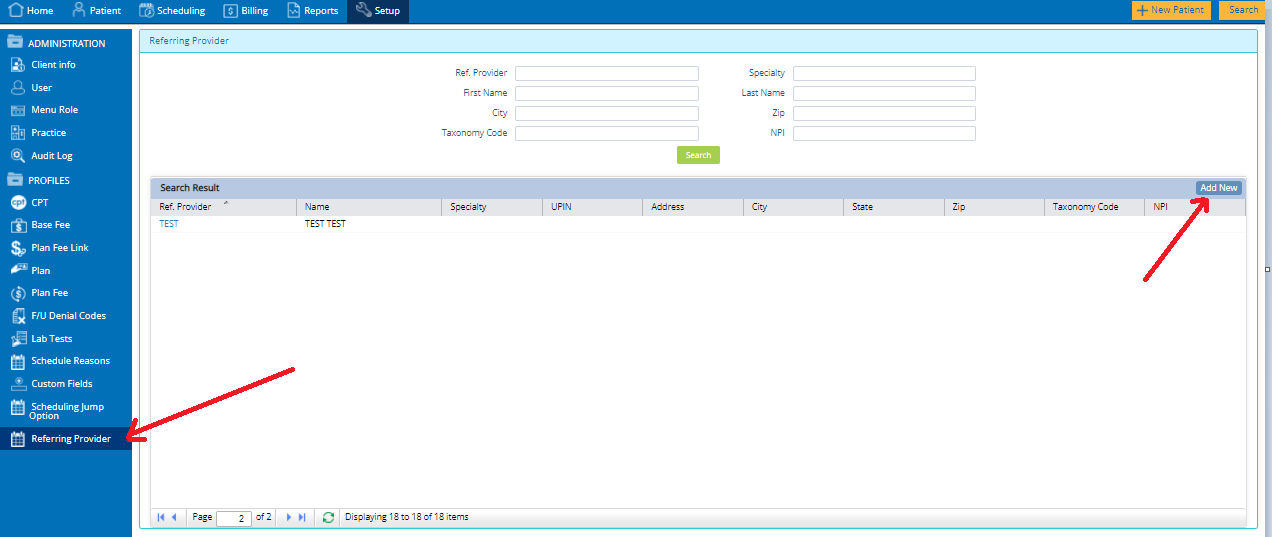
1) Add Referring Provider: A referring provider may be added from the demographic screen using the magnifier glass icon; however, during setup, it will be more efficient to use the new option from the Setup menu. Select “Add New’’ from the Referring Provider option.
Pathway: Setup > Profiles > Referring Provider option
2) EPCS Configuration Alert: Successful enrollment of the token for prescribing controlled substances requires a precise sequence of events. This enhancement ensures the provider completes the enrollment steps in the correct order. Practice EHR will now display an alert message to guide them through the process step-by-step.

As a reminder, the EPCS process requires the following steps:
1. The admin user will go to Setup > User > Open provider’s user and select “Rx/Lab Provider” and click “Update User.” (Please note and match the Rx/Lab provider. This should be the same as the user.)
2. Check the “EPCS Settings” and click “Update User.”
3. Go to the “User Settings” gear icon and select the tab for EPCS Settings. Complete the steps on the screen to order the token from Exostar. The token/device will typically be sent to the shipping address provided within 3 to 5 business days. Exostar will also send a confirmation and license key email. These emails will be needed during the identity proofing step(s).
4. Once the token/device and license key are received, the provider must enter them into Practice EHR. Go to the "EPCS Settings" tab from User Settings, enter the Token # and License Key #, then click “Update Information.”
5. Click on “Start Registration” and proceed with all information required by Exostar. Please note that the provider should answer the questions to validate ID proofing (IDP). These questions are specific to financial transactions and are time-sensitive. If there is a long delay in responding, the system will count the entry as an error. Any errors may require the provider to complete a screen share authentication.
6. Once IDP is complete, the provider will open their User profile (Setup > User) and check “Allow EPCS” then click “Update User.” Please re-open the user profile to ensure “Allow EPCS” is checked.
7. Once “Allow EPCS” is checked, then also check the box “EPCS 2nd Approver” and “Update User.”
8. Re-login/Refresh the page of the Provider’s user. Then go to User Settings > EPCS Settings > 2nd Approver Section. From there, select a provider and click "Approve." A window will open where the user can proceed with checking the following boxes:
Practice EHR Login Password
Token Type
OT Code
Click "Approve"
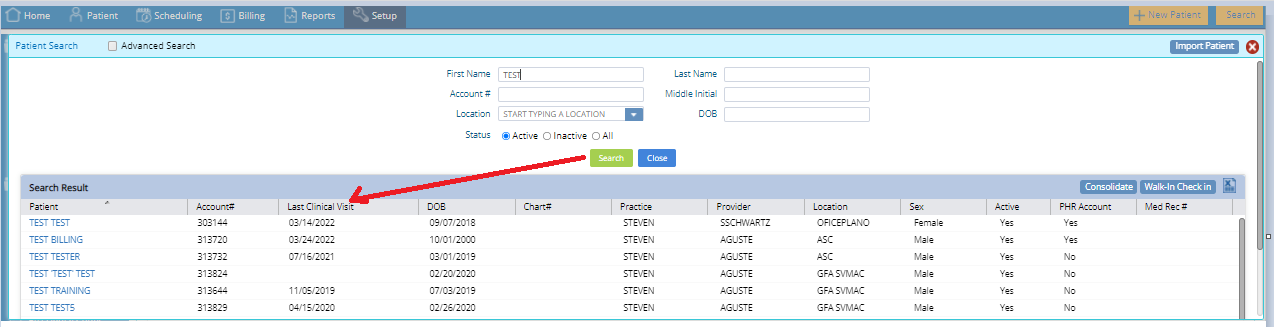
3) Last Seen Date: This enhancement helps the practice quickly identify when the doctor last saw a patient. Under the Patient Search window, the “Last Clinical Visit” field has been added to show the date of the last clinical visit – even if that note has not yet been signed. Previously, these search results displayed the last financial record.
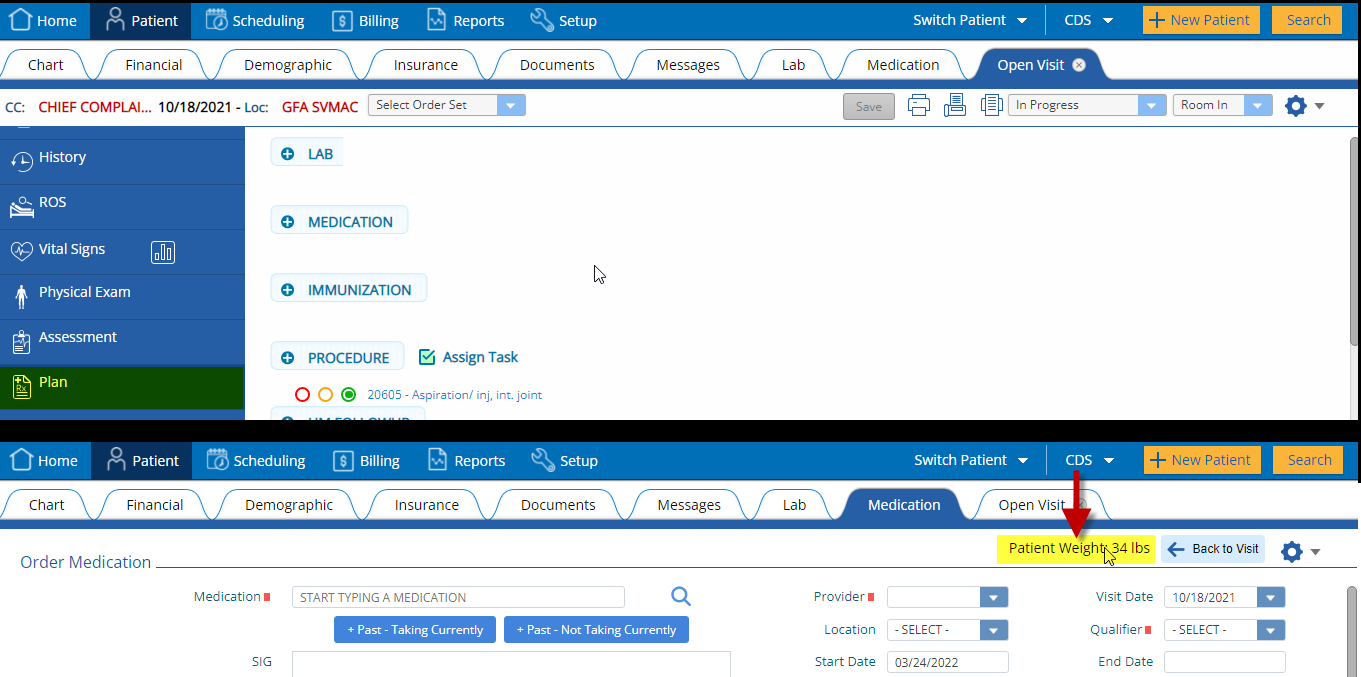
4) Patient’s Weight on the Medication Screen: The patient’s weight can now be seen from the vital section when the Medication tab has been accessed through the plan section of the same visit.
5) Filter Tracker Board: This enhancement allows the practice to filter the Tracker Board display by both the provider and the existing location.

NOTE: The following release points include several updates to manage your Practice EHR subscription. If your trial account has been linked to a channel partner or reseller, this feature will not be active. A message will display to redirect the client as shown below:
Please contact your reseller, [Reseller Name], to discuss options and pricing
6) Buy Button: The functionality of the existing “Buy” button has been expanded with this enhancement. You will now be able to independently upgrade your Trial subscription to a production version ready for implementation. Users can select the desired products they need (EHR + PM or EHR only or PM only) and confirm the number of providers who will be licensed to complete chart notes and submit claims. Additional products (i.e., Kiosk & Telehealth) may also be added.
Consistent with other screens within Practice EHR, any field with a small red square identifies required data.

Users can select their preferred payment methods (Credit Card /ACH) and enter the appropriate information. After purchasing, a receipt and confirmation email will be sent.
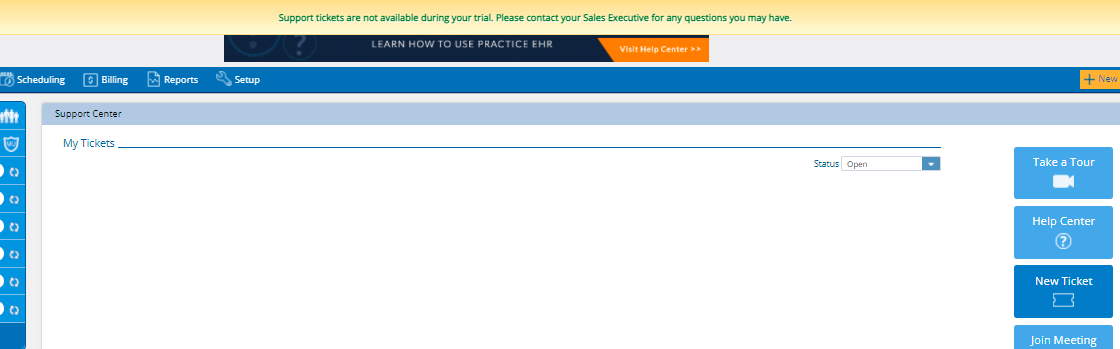
7) Support Center: This Support Center update assists in getting the right question to the right resolution team to ensure a successful client experience.
When using a Trial subscription, users will be notified with an alert message when selecting a ‘New Ticket’ from the Support Center.
The New Ticket will be active for clients requesting a self-guided implementation, subscriptions in a Production status, and other situations on request.
8) Invoice View: Subscription invoices can be viewed from the Client Info section and will now be identified as Monthly, Quarterly or Yearly. Invoices can be accessed from Setup > Client Info > Invoices.

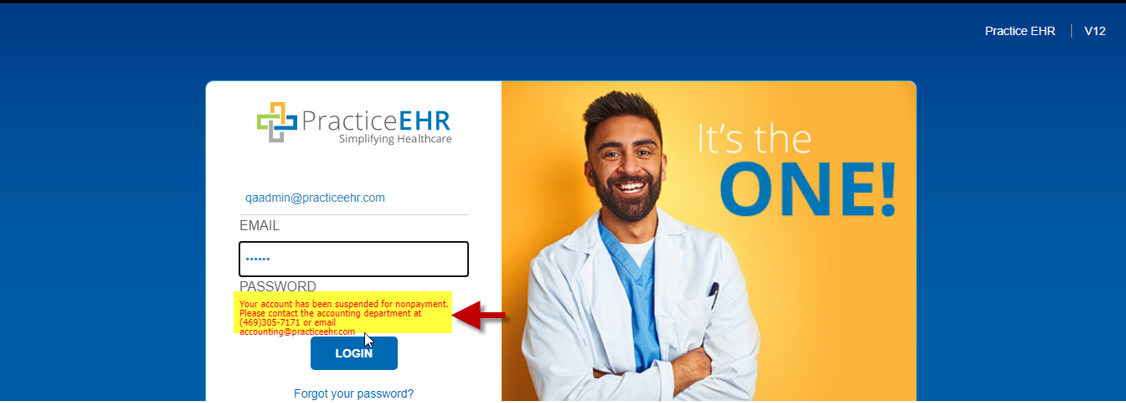
9) Suspended Account: The following message will now be displayed when an account has been suspended on the Practice EHR login screen.


![]()
![]()


