
Practice EHR has launched the "SMS Conversation" feature, adding a new dimension to medical practices’ patient outreach messaging efforts. The SMS conversation feature will allow users to send SMS messages to patients and receive SMS / MMS messages from patients.
This new feature will enable medical practices to:
Note: SMS Conversation feature is not available by default. Users can have SMS Conversation feature setup for them as per their requirement by getting in contact with Practice EHR Support.
SMS Conversations pertaining to a single patient can be accessed from the “SMS Conversation” sub tab. This sub-tab has been added to the “Messages” tab within the patient module.
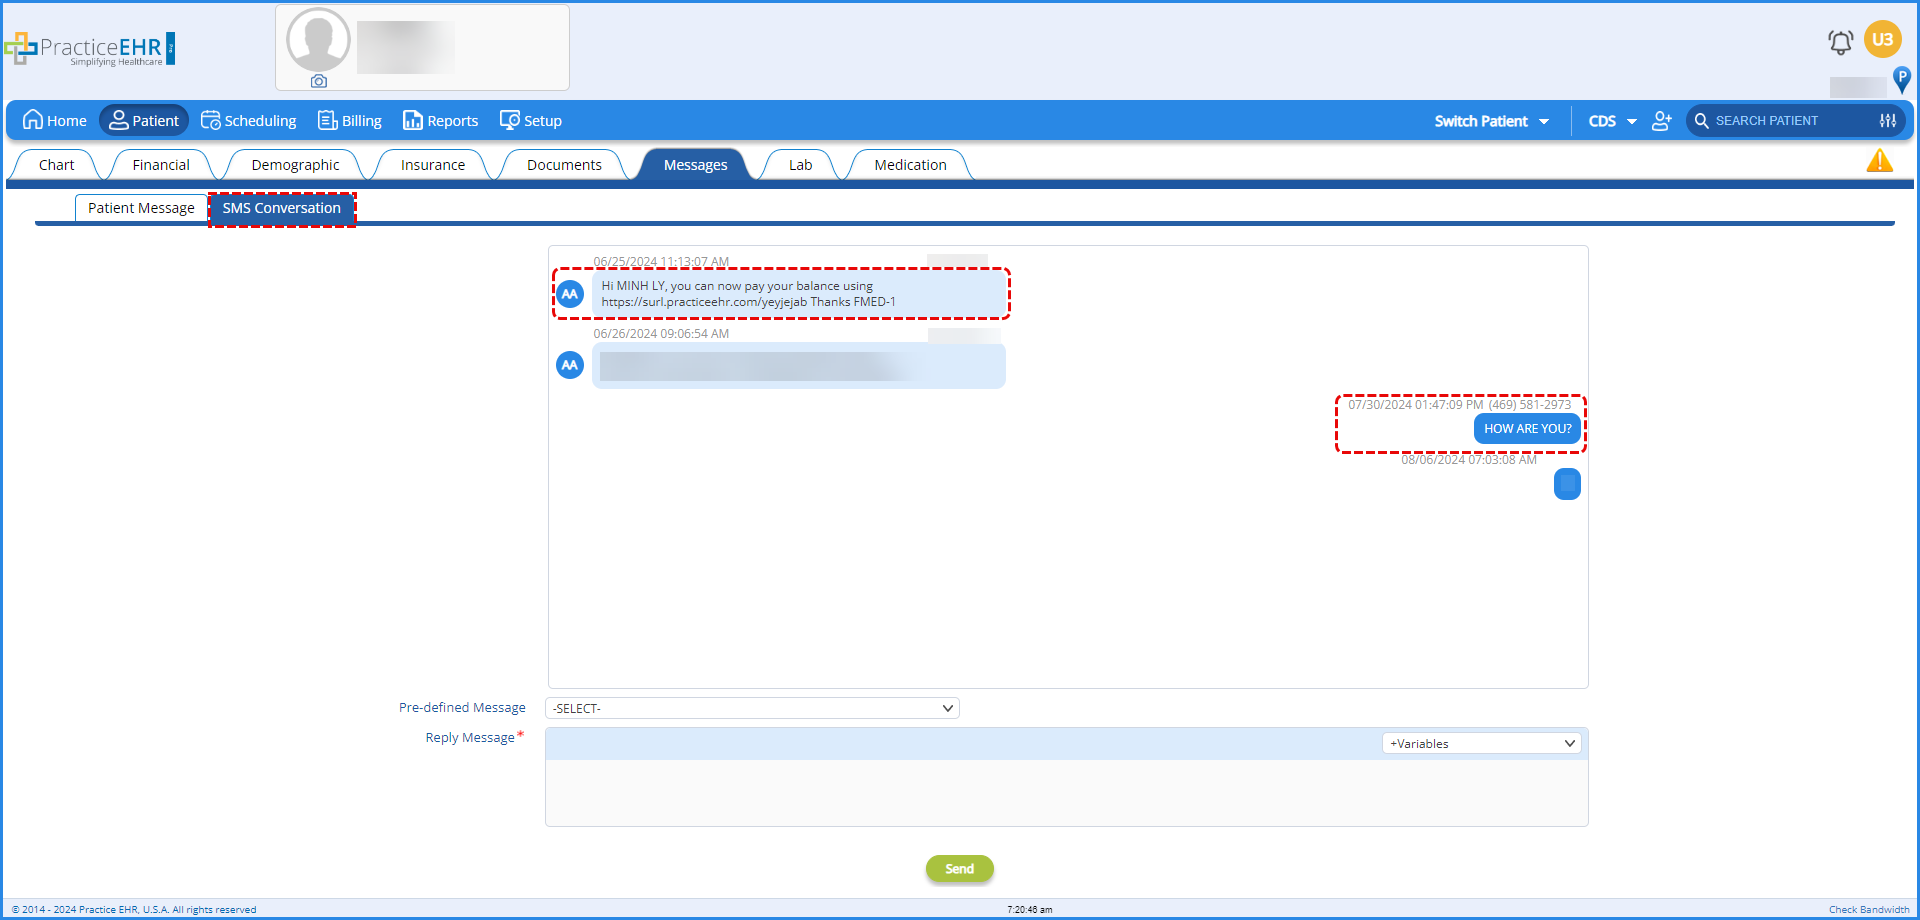
Here users will be able to view all SMS messages sent to and received from patients, as well view MMS messages sent by patients. Note: Messages sent by users will be displayed on the left, while the messages received from patients will be displayed on the right.
By default, the conversation window displays messages that are up to 30 days old. Older messages can be viewed by clicking on the “Show More” button displayed at the very top of the conversation window.
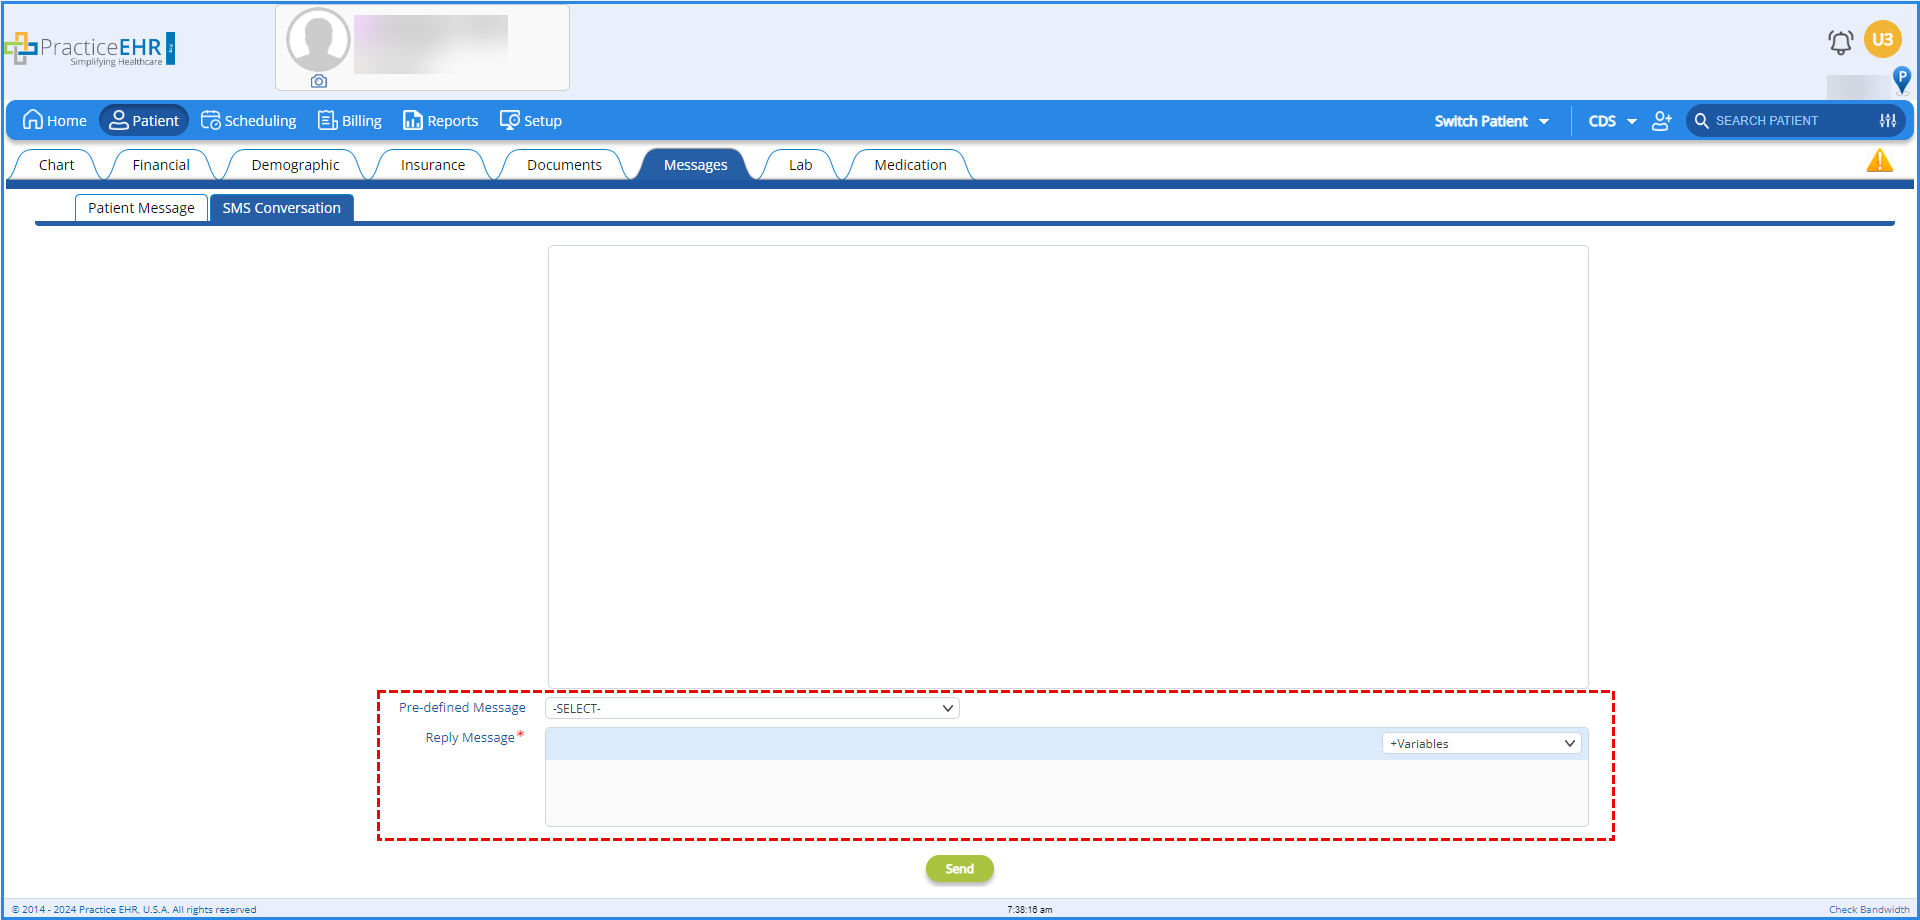
Within this “SMS Conversation” sub-tab, the provision to reply to patients by text is available along with the ability to add variables or select predefined messages. Note: In order to send SMS messages to a patient, the patient’s cell number must be provided in their demographics, if not then the reply message text box will be disabled.
This allows for all SMS messages related to a patient to be consolidated in one place, allowing multiple different users to stay up to date on a patient’s correspondence.
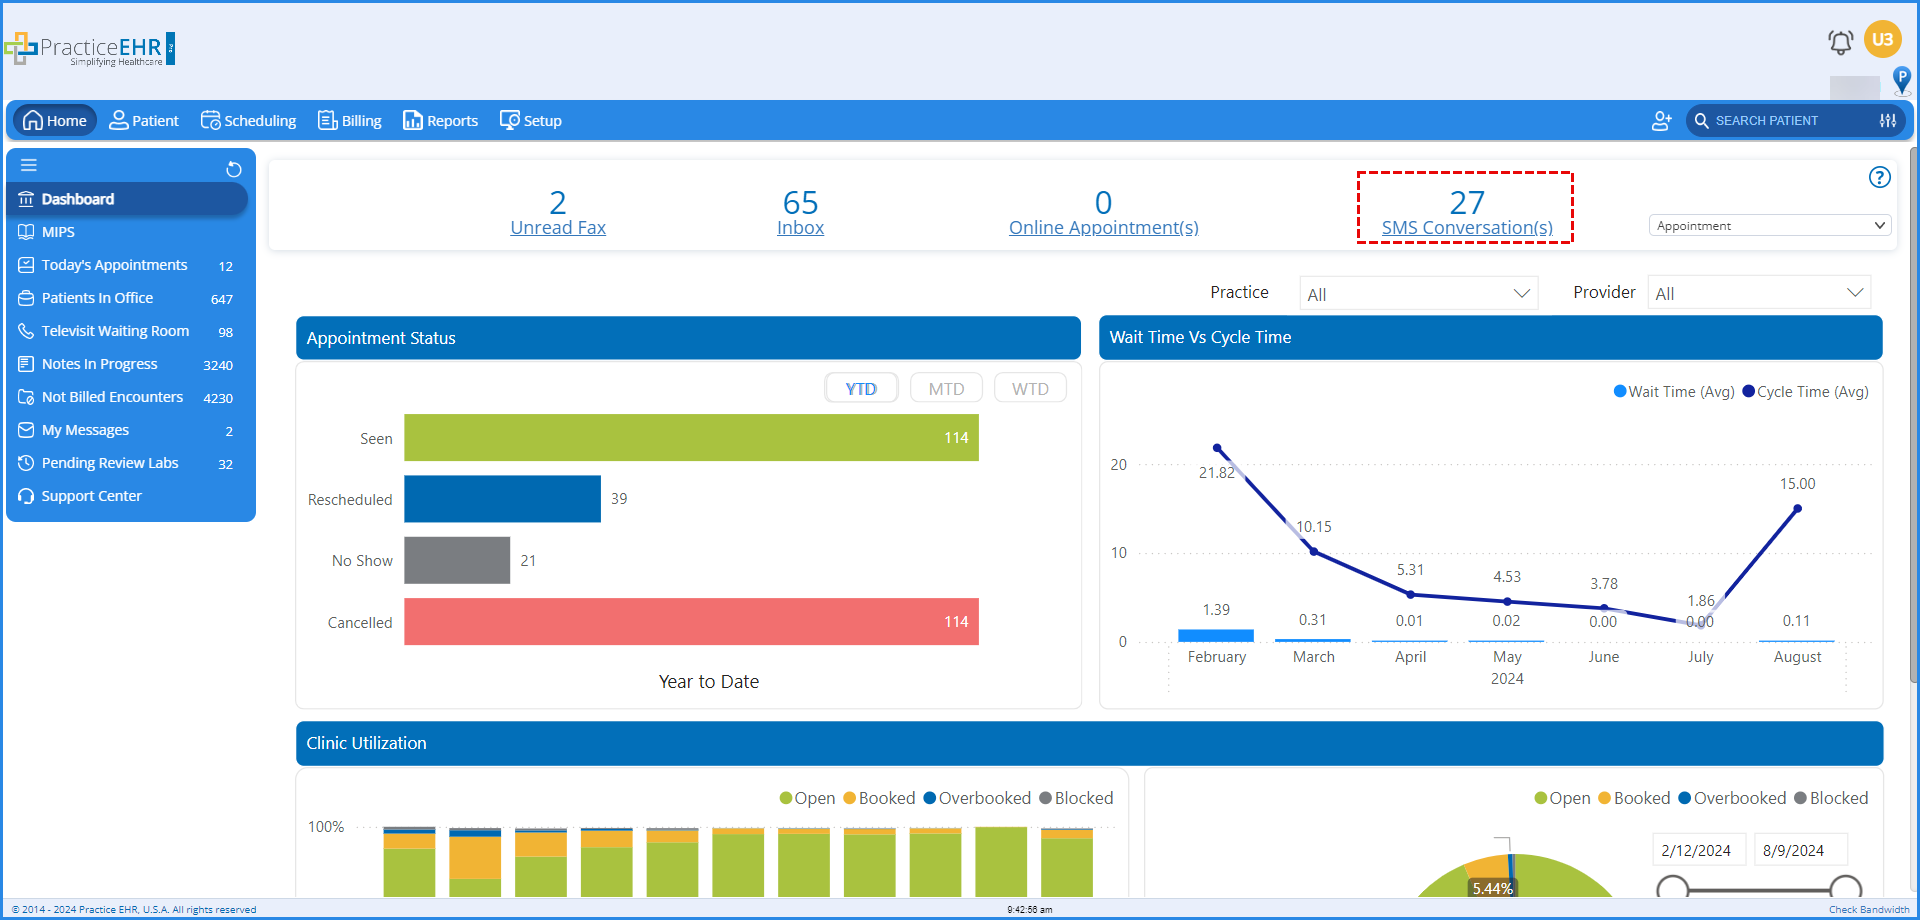
To access all SMS conversations within the practice, users can click the “SMS Conversations” link added to the dashboard on the home page. This link gives a count of the unread conversations.
Clicking on this link will redirect users to the “SMS Conversation” report. This report has been added in the “General” folder of the reports module.

Users will be able to filter for SMS conversations based on the following values:
Some SMS conversations may not be linked to a certain patient, for such cases users will be able to link SMS conversations to patients using the “Link” button added in the conversation grid header.
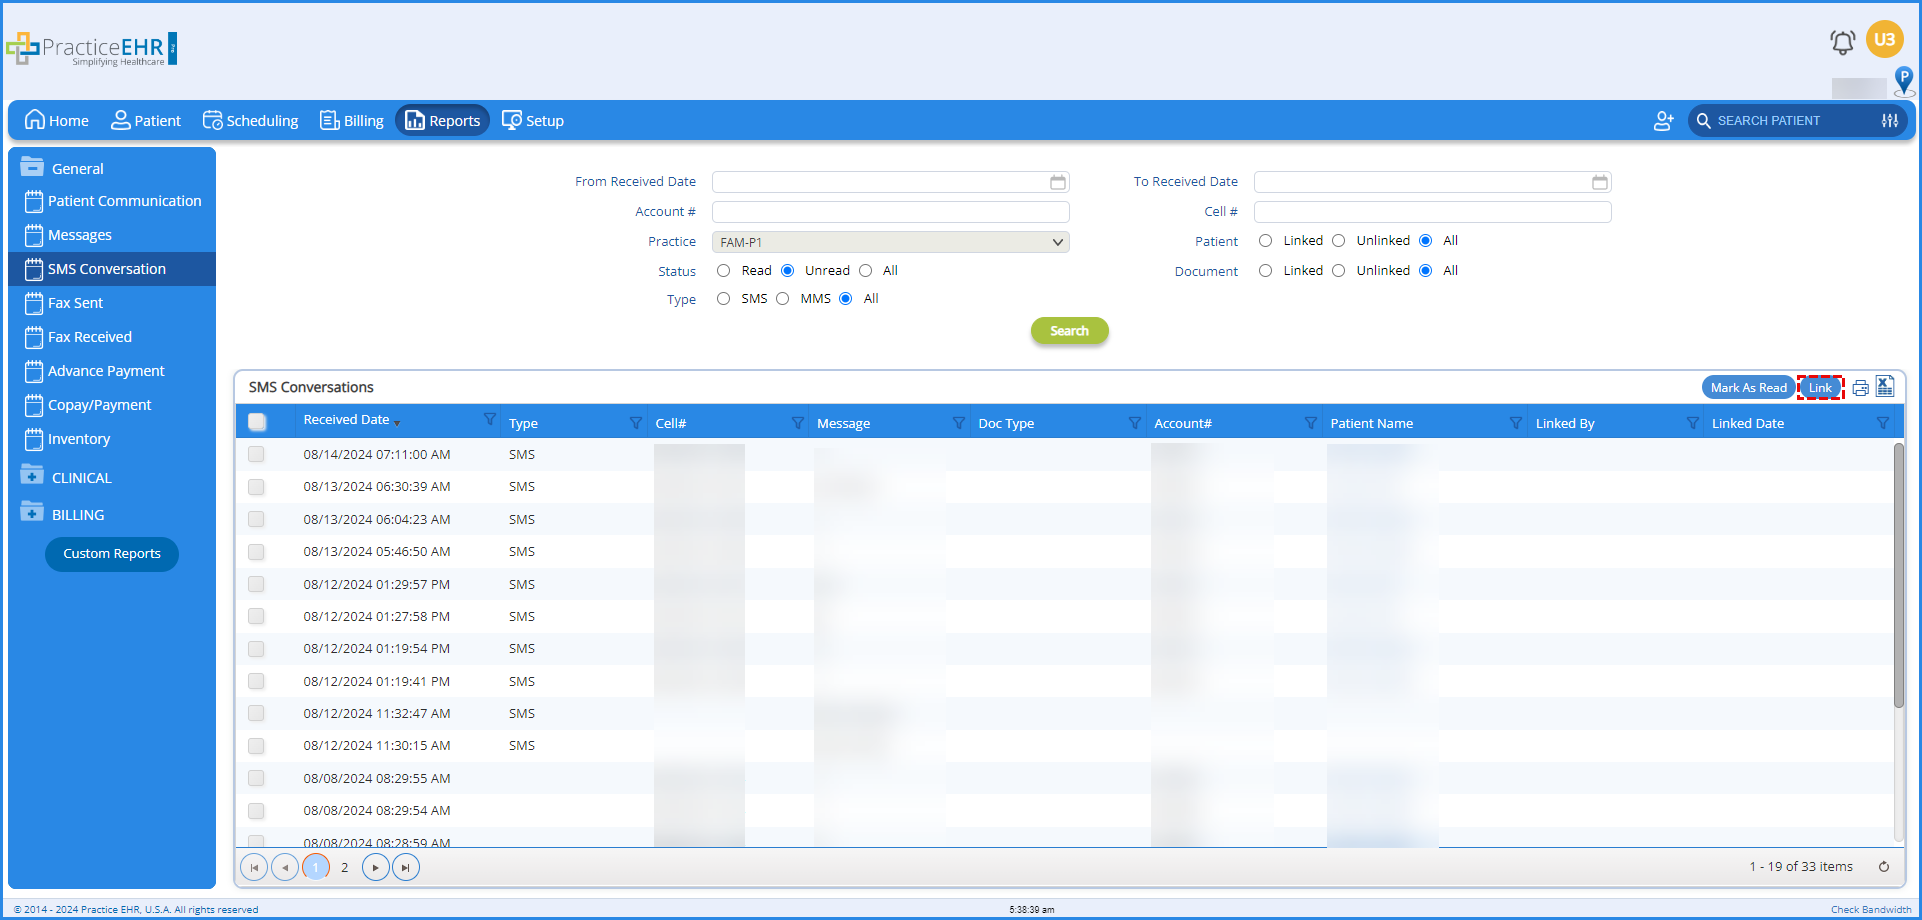
Clicking on this button will open the patient search window, prompting the user to choose a patient to link this conversation with. Users will be able to run a patient smart search from this window, or click on the advanced options icon to filter for patient using additional values.

Building on the “Patient Messaging Automation” feature, users can now configure groups, events and workflows. Allowing them to manage pre-built text and email messages as required.
An automation profile has been added in the “Profiles” folder, within the “Setup” module as shown below.

The Automation menu contains the group, event and workflow sub-tabs.
In the “Group” sub-tab, users can search for existing groups by name. In addition, users can create a new group by clicking on the “Add Group” icon. Clicking on this button will open the “Add Group” window.
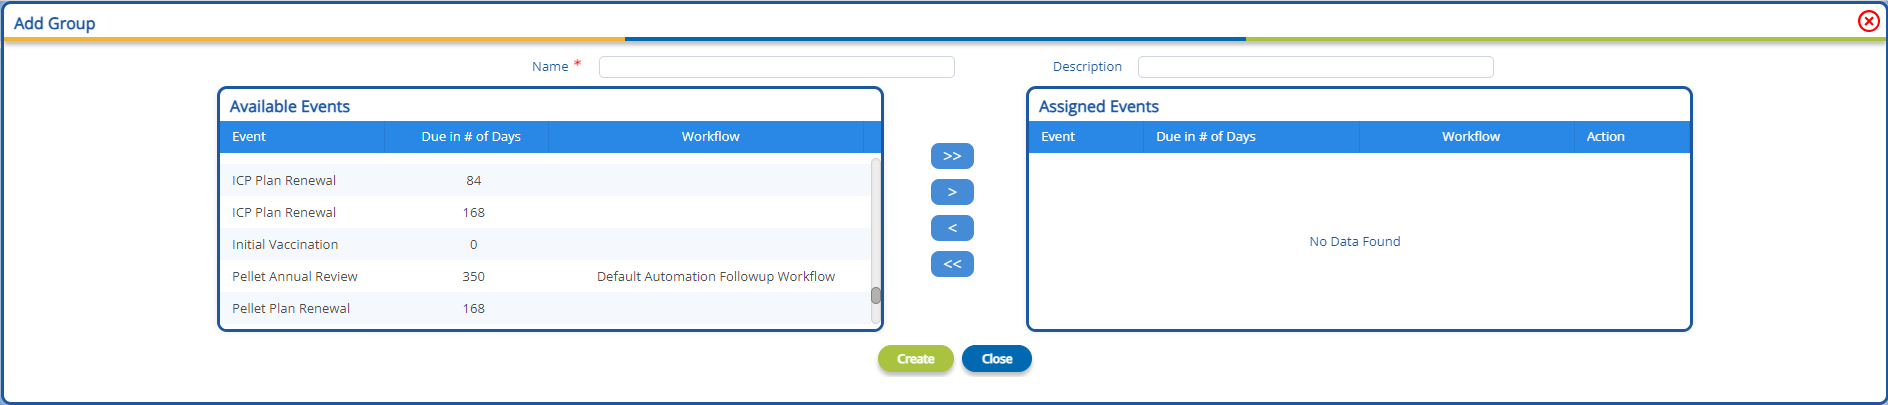
Here, users can create a group by entering a name and description. Two sub grids are available:
The navigation buttons between the grids allow users to assign or remove events from the group.
In the event sub-tab, users have the ability to create, update and search for events. Users can search for a specific event by name.
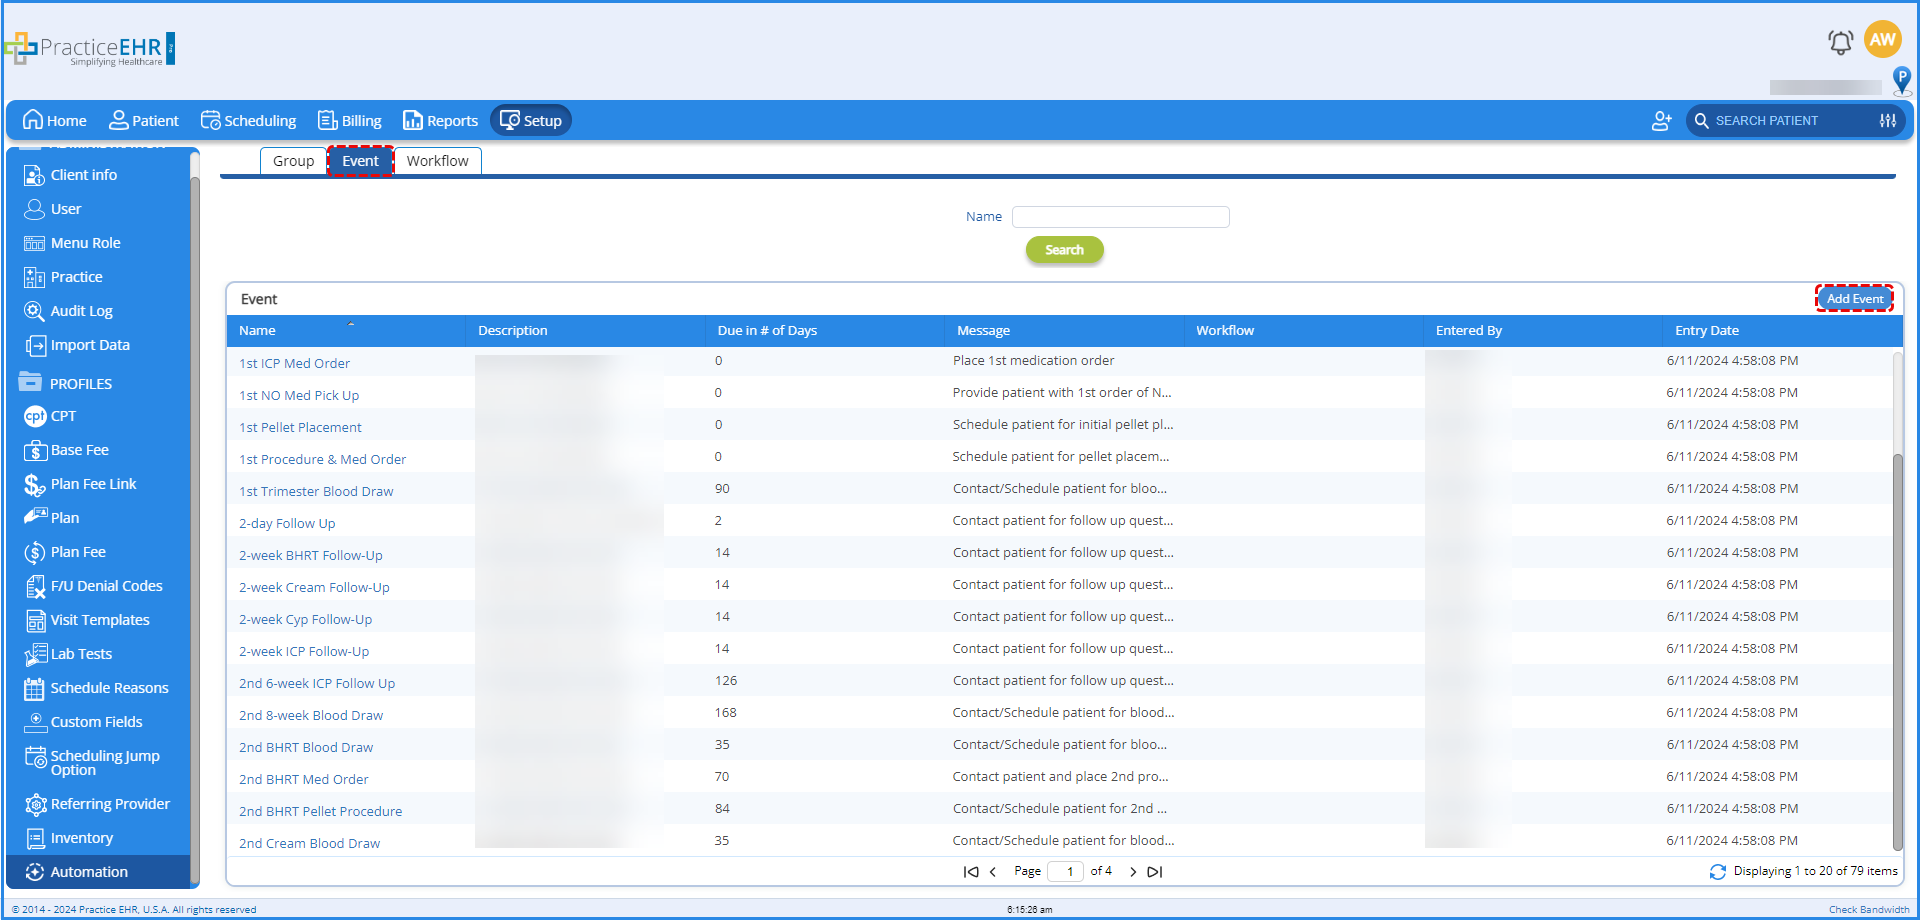
Clicking on the “Add Event” button will allow users create a new event from the “Add Event” window.

Users will be required to add the event name, number of days the event will be due from the start date and the message text that will be displayed. In addition, users have the option of assigning a workflow to the event.
Users will be able to update an event by clicking on it from the event grid. Doing so will display the “Event” window.

In the workflow sub-tab, users have the ability to create, update and search for workflows. These workflows can then be assigned in the events as required. The provision to add individual actions within workflows has also been provided. Users can search for a specific workflow by name.
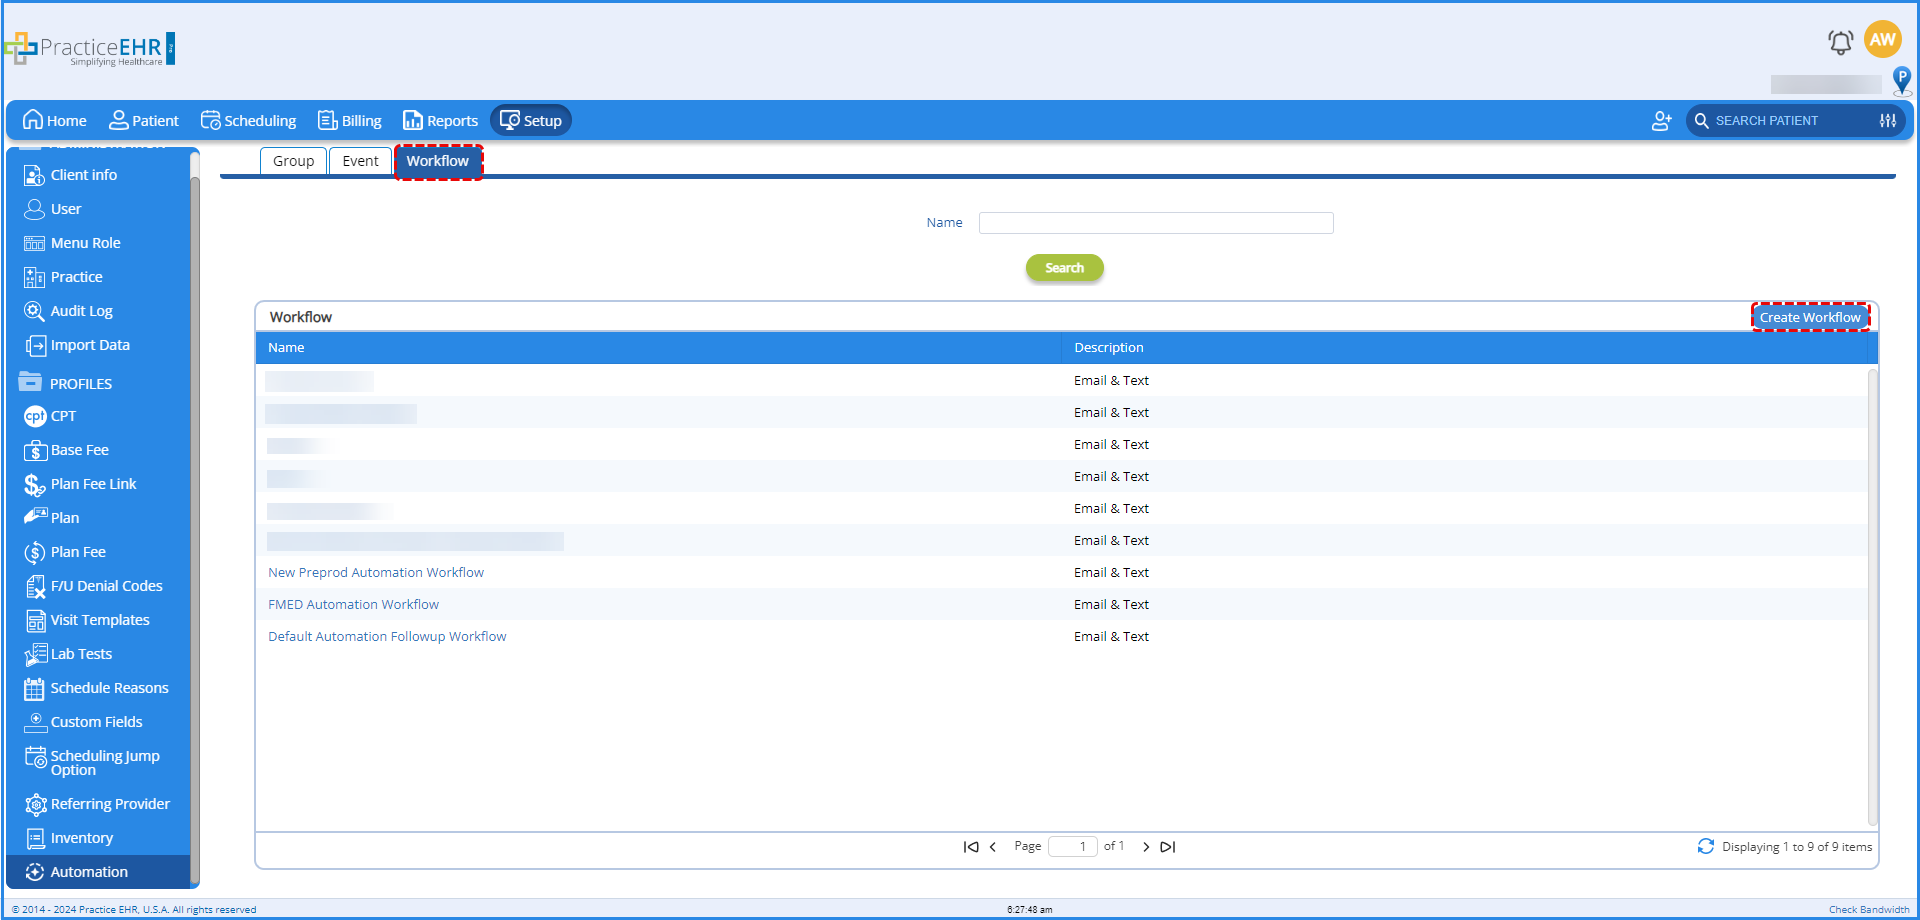
Users can create a new workflow by clicking on the “Create Workflow” button, which will open the workflow menu.
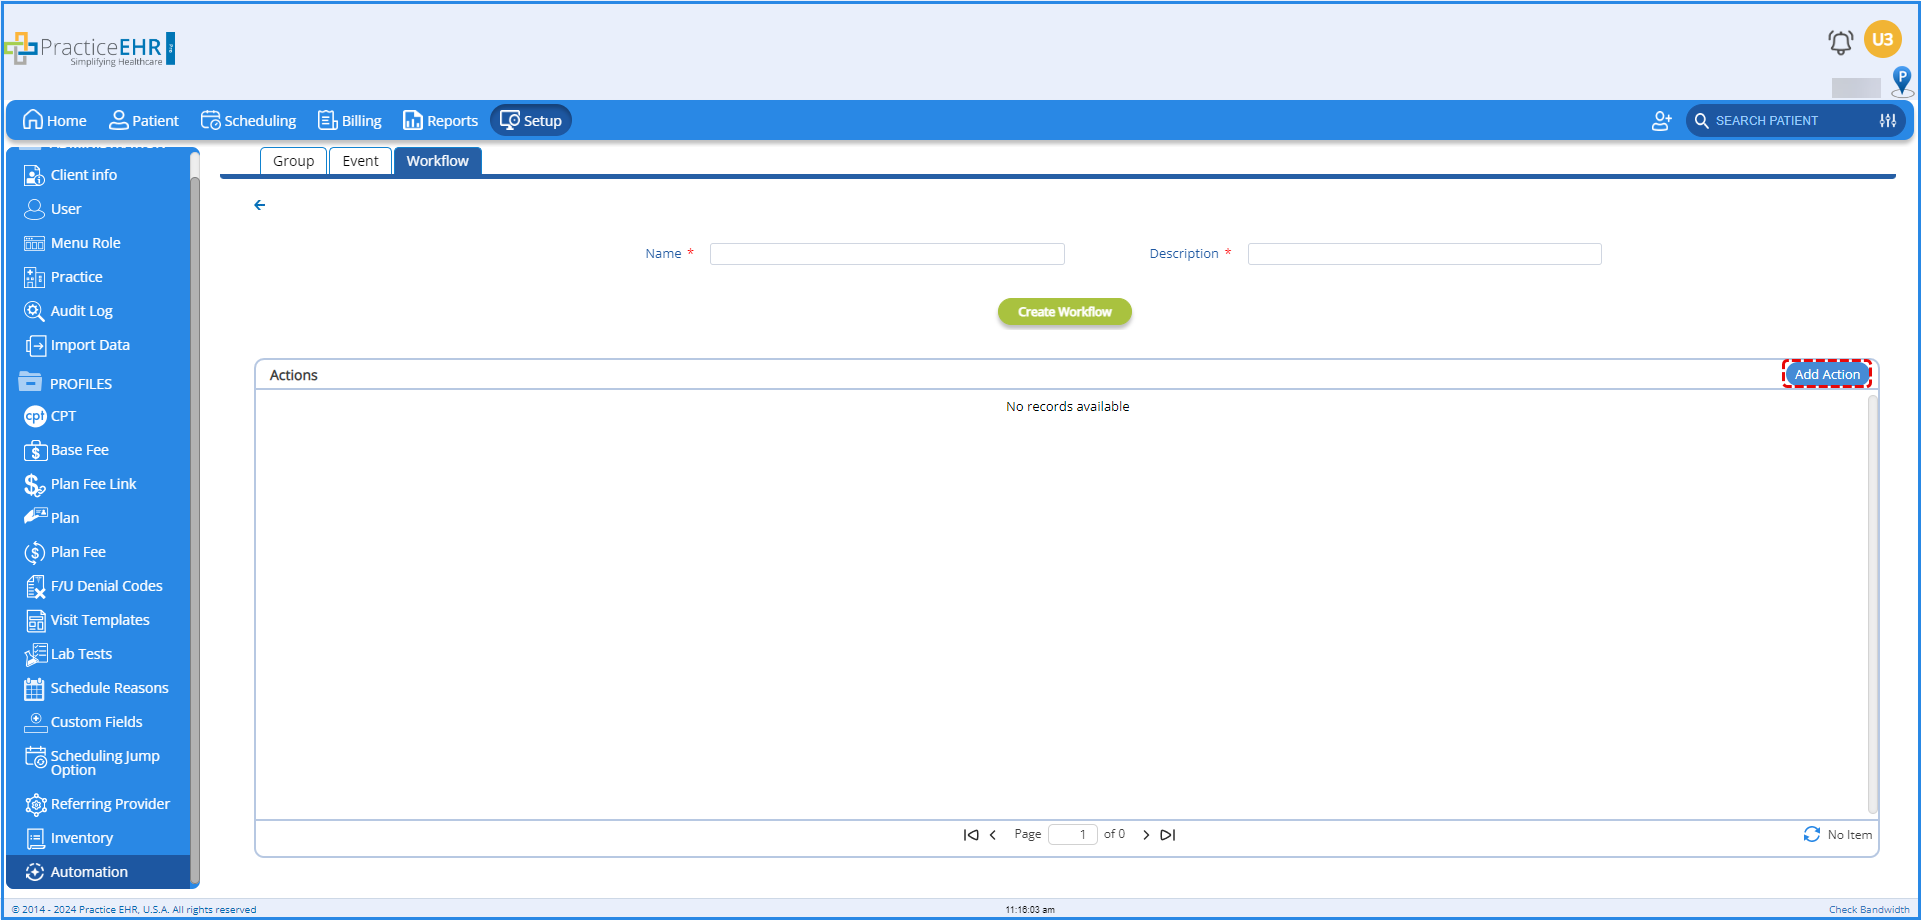
A workflow can be created by simply entering the workflow name, description and clicking the “Create Workflow” button. Users can add an action to the workflow by clicking on the “Add Action” button, which will display the following window.
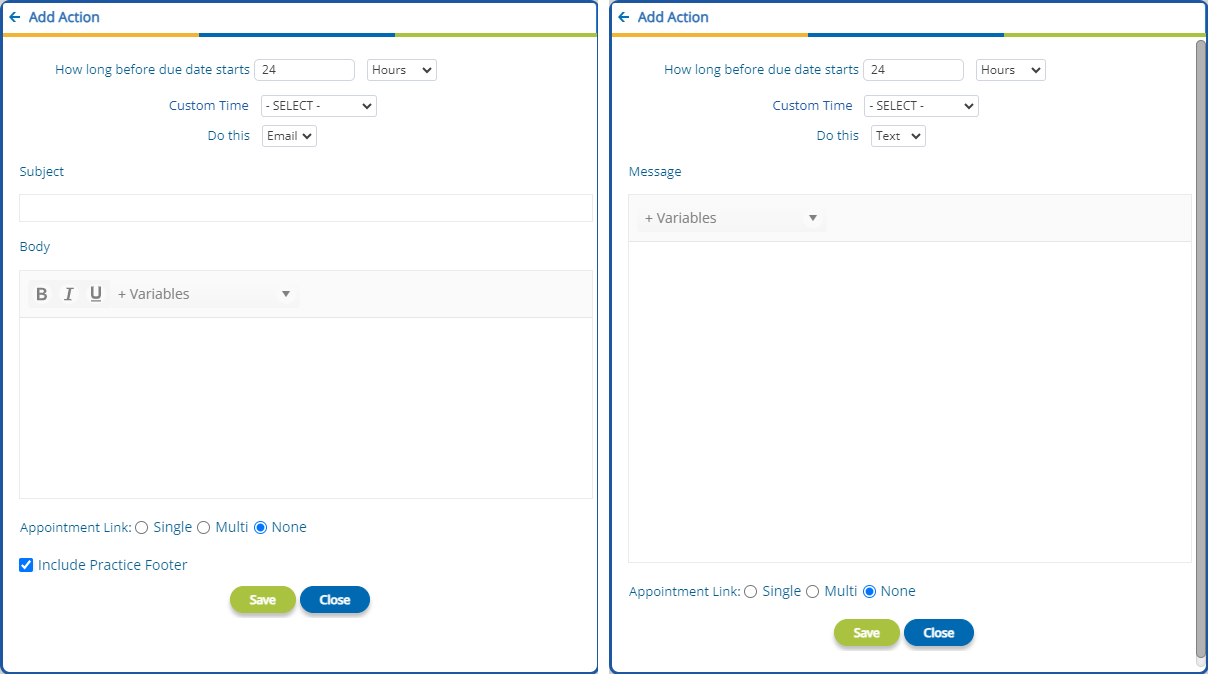
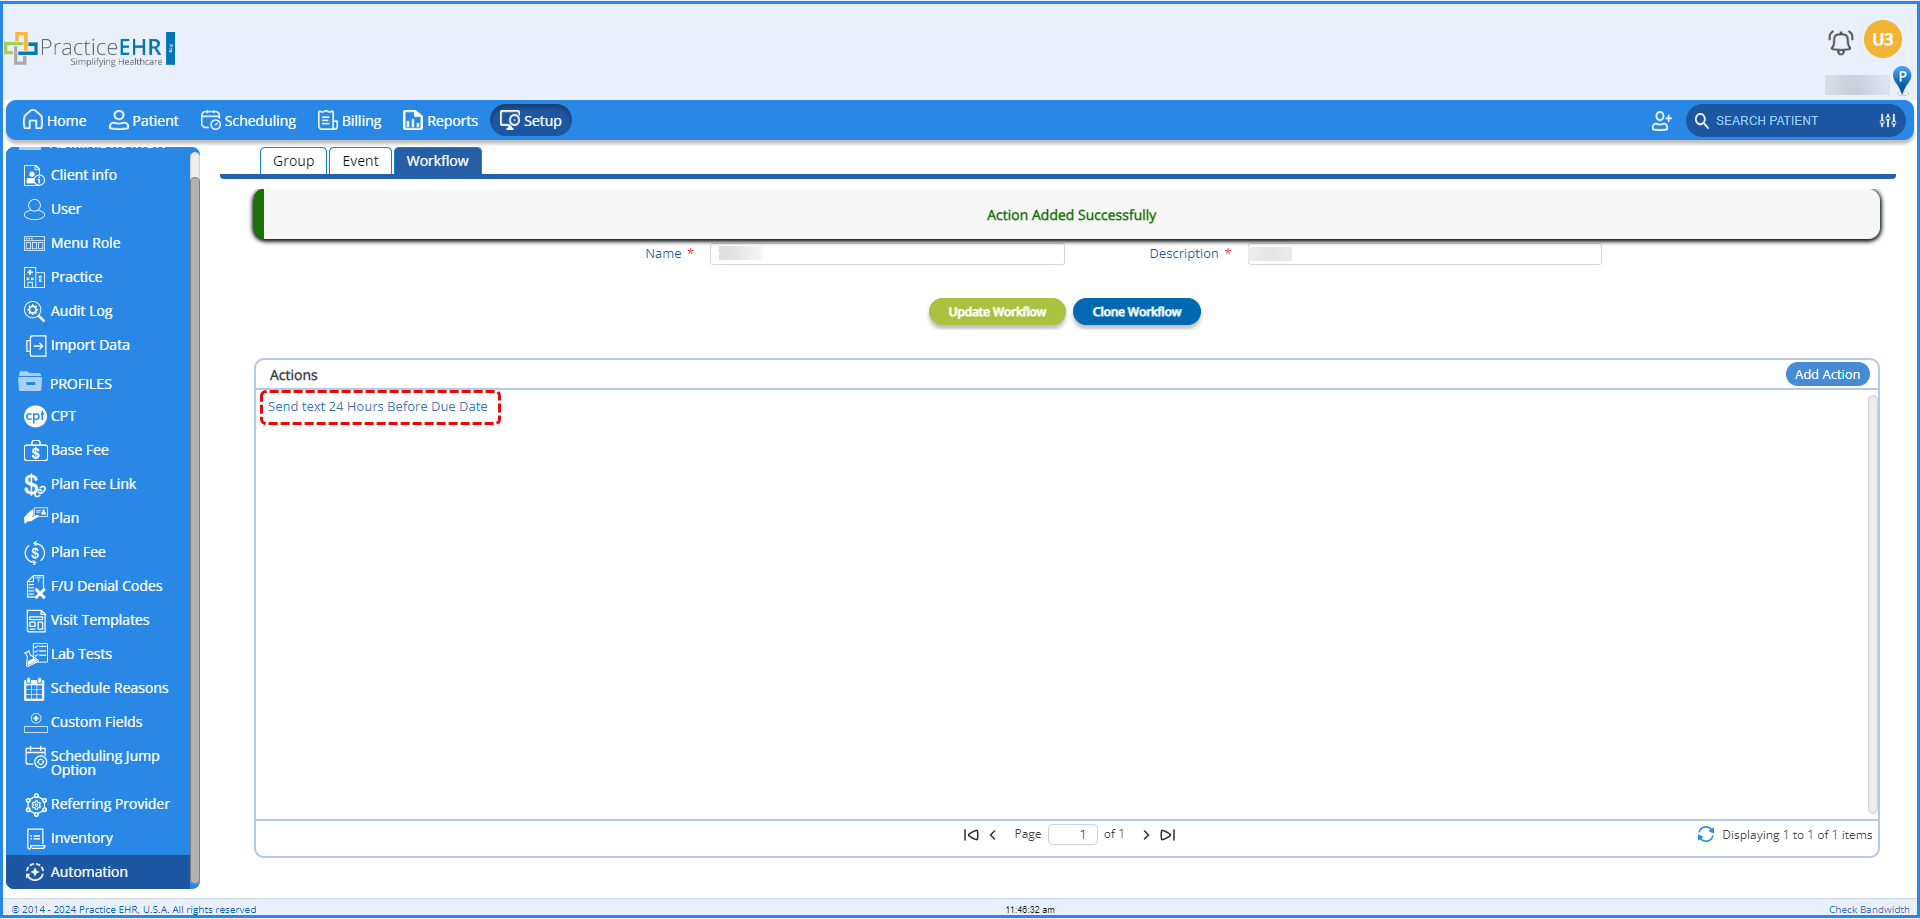
Clicking the save button after entering the required details will add the action in the “Actions” grid and display the following confirmation message
Users can update any workflow as required by selecting it from the workflow grid. Doing this will open the workflow menu.
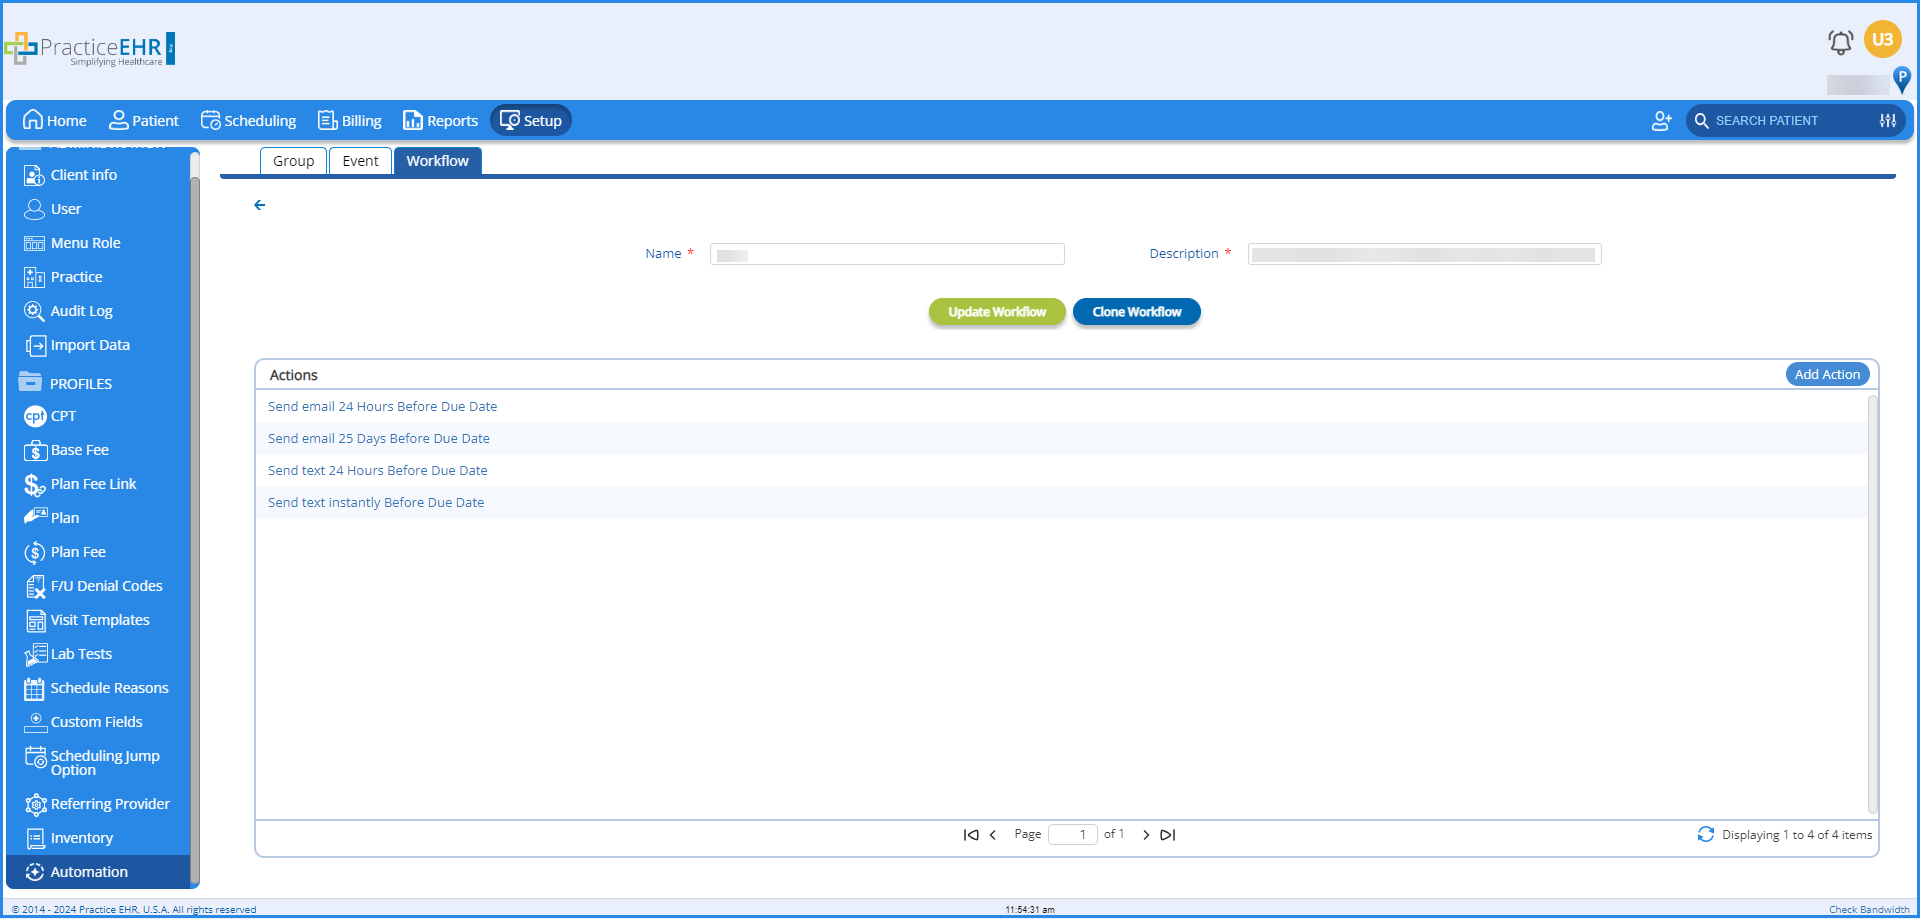
Here, users can update a workflow’s name, description, individual actions and add more actions to the workflow.
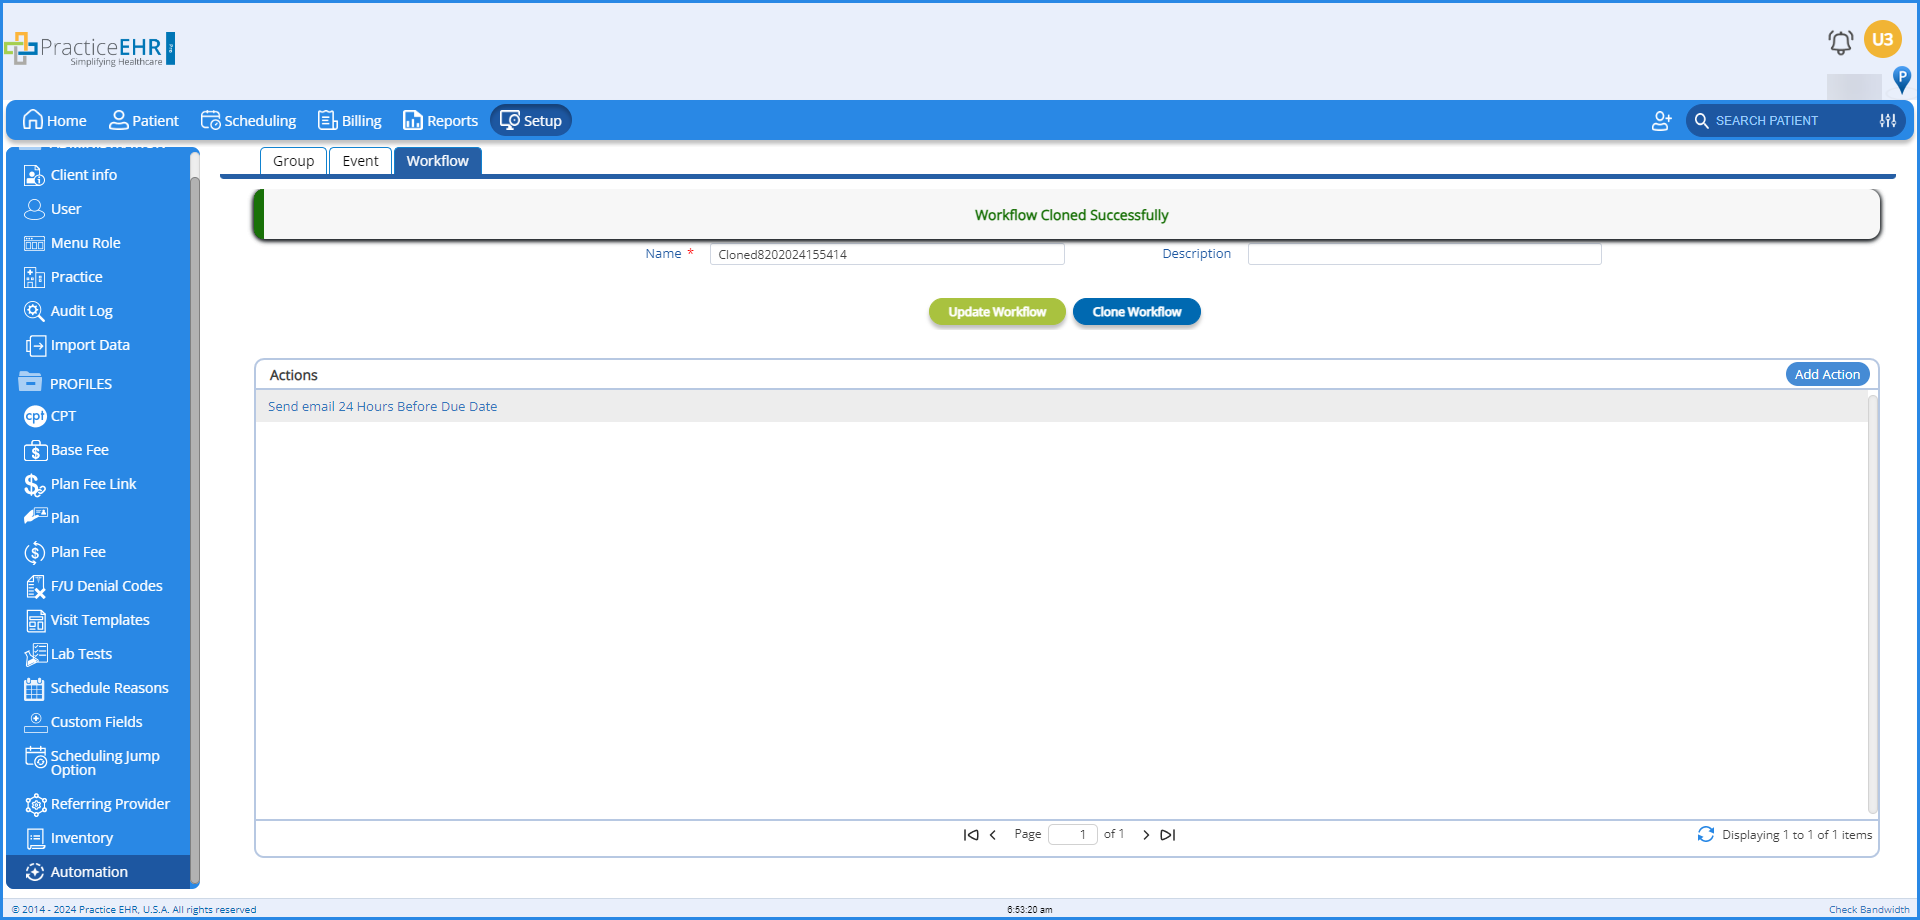
Users can also clone a workflow. This can be done by navigating to the workflow menu and clicking the “Clone Workflow”. Doing this will create a clone with an arbitrary name as shown below.
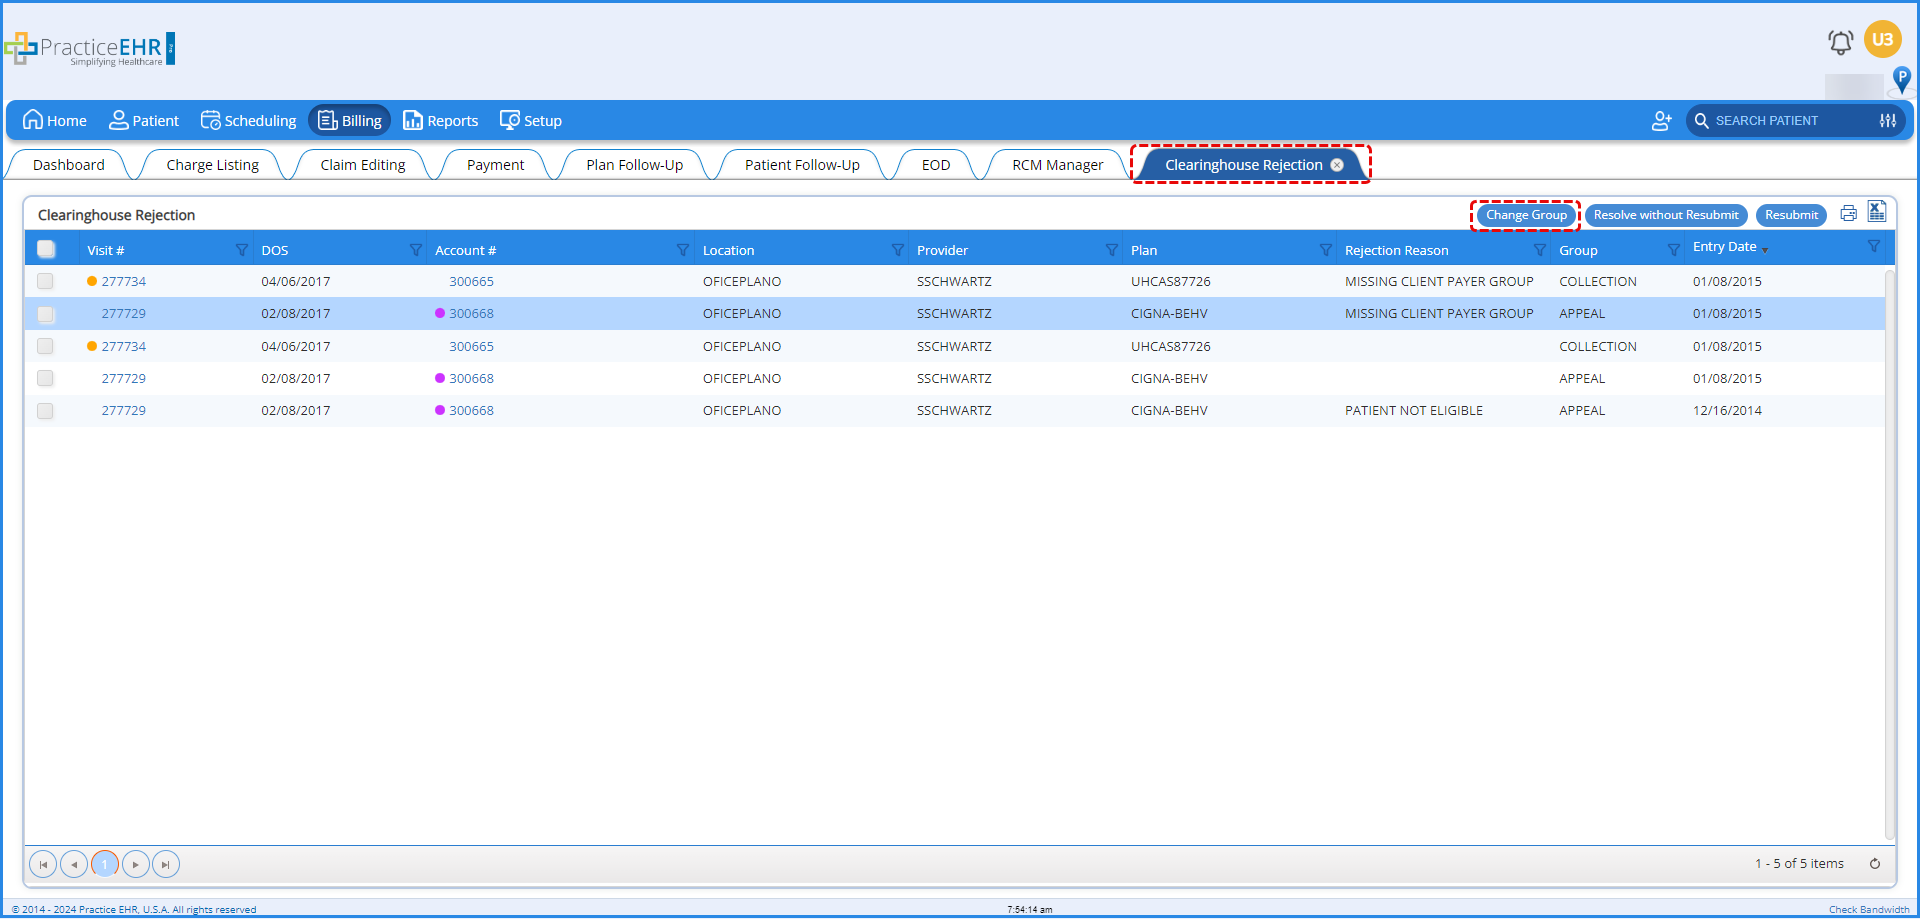
Users can now update the group assigned to a visit from the “Claim Editing” sub-tab and the “Clearinghouse Rejection’ sub-tab. This enhancement simplifies the organization and internal management of follow-ups. The group of a visit can be updated using the “Change Group” button.
Clearinghouse Rejection Sub-tab
Claim Editing Sub-tab
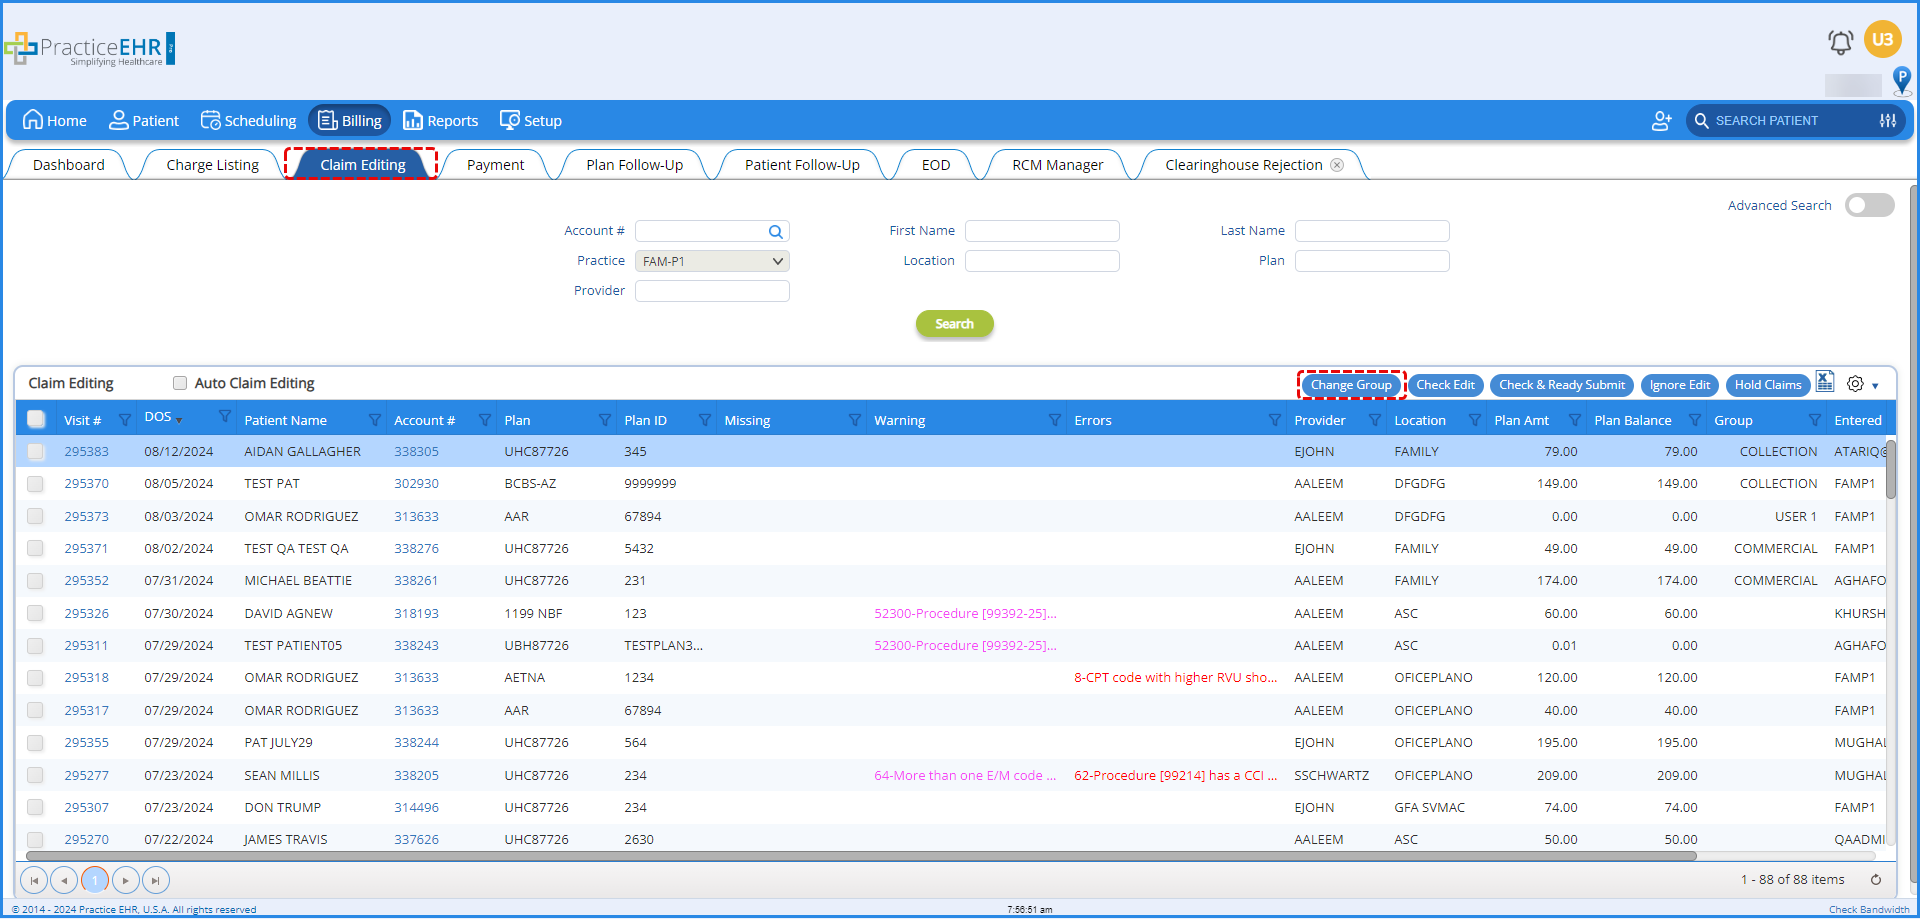
Clicking on the “Change Group” button, after selecting the required records, will open the “Change Group” window. From this window, users can select the group from the dropdown.


![]()
![]()


